• Skip to primary navigation
  • Skip to main content
High Desert Table

High Desert Table

Your everyday guide to Southwestern cooking

  • Home
  • Recipes
  • About
  • Shop
  • Private Events
  • Contact
  • Show Search
Hide Search

summer

Key Lime Cheesecake with Gingersnap Crust

Marianne Sundquist · November 17, 2024 · 1 Comment

For my husband’s birthday this year, my dessert plan included a mash-up of his two favorite desserts: key lime pie and cheesecake. I mean why not? They both often have some kind of graham cracker-style crust and a silky smooth filling. And after thinking more about it, I can’t believe I haven’t tried this before. I eventually landed on my go-to cheesecake filling poured over a gingersnap crust, and after the cake was completely cool, spread with a generous amount of bright and tangy lime curd. This key lime cheesecake can be enjoyed just like this, or garnished with a spoonful of whipped cream and/or fresh berries.

The Perfect Crust: Choosing the Right Gingersnaps

When looking for ginger cookies, the key is that they are crunchy. They come in all sorts of shapes and sizes, which is why you’ll notice I mentioned the weight (180 grams) in the ingredient list. The cookies I used were small rounds with little bits of candied ginger throughout and were a generous two cups. Depending on the size and shape, this could show up differently for you. If you have a scale, this is the one ingredient in this recipe that I would recommend weighing. Otherwise, just use your best judgment.

The easiest way to approach this recipe, which is really quite simple, is to make it the day before. This way you have plenty of time to make the cake, let it cool slowly to avoid cracking, and then let it firm up in the refrigerator. 

Also in the recipe, you’ll notice that I suggest using a 9-inch or 10-inch springform pan. If you use a 9-inch, the cake will be taller, and you can cut thinner slices. If you use a 10-inch pan, the cake will be shorter and each piece can be cut a bit wider. Additionally, if you don’t have a springform pan, don’t worry, feel free to use a 9×9” or 10×10” baking dish as well.

Print

Key Lime Cheesecake with Gingersnap Crust

HDT cloud cheesecake plated with whip cream and raspberries
Print Recipe
Pin Recipe

5 Stars 4 Stars 3 Stars 2 Stars 1 Star

No reviews

This key lime cheesecake combines the tangy brightness of key lime pie with the creamy decadence of cheesecake, all on a crunchy gingersnap crust. Topped with zesty lime curd, it’s an impressive dessert perfect for birthdays or any special occasion.

  • Author: Marianne Sundquist
  • Prep Time: 3.5 hours
  • Cook Time: 90 mins
  • Total Time: 5 hours
  • Yield: 10-12 servings
  • Category: dessert
  • Method: baking
  • Cuisine: american

Ingredients

Units

for the crust:

  • 2 c. (180 g.) ginger snaps
  • 1/4 c. granulated sugar
  • 5 T. butter, melted


for the filling:

  • 2 lb. (4 packs) cream cheese
  • 1 c. granulated sugar
  • pinch of salt
  • 2 t. vanilla extract or paste
  • 4 eggs
  • 1 c. sour cream
  • 1/2 c. heavy cream


for the lime curd:

  • 1/2 c. granulated sugar
  • Zest of 4 limes
  • 1/2 c. freshly squeezed lime juice
  • 3 large eggs
  • pinch of salt
  • 4 T. butter, cold & diced

Instructions

Preheat the oven to 350 F. Line a 9″ or 10” springform pan with a round of parchment paper. This will enable you to move the cheesecake to a different platter before serving. First, let’s make the crust. In a very dry blender or food processor, pulse the gingersnaps into a powder.  Transfer this to a bowl and stir in the sugar and butter. Using a flat-bottomed cup, press the mixture semi-firmly into the bottom of the springform pan. Bake for 10 minutes and remove from the oven.

key lime cheesecake dry ingredients prepped in a bowl

Making the Creamy Filling

While the crust is cooling, make the filling. Place the cream cheese in an ovenproof baking dish and bake for 15 minutes. Carefully transfer the warm cream cheese to the bowl of a stand mixer or a large mixing bowl. Whisk in sugar, salt, and vanilla and mix thoroughly. Add eggs one at a time, whisking well after each addition. Stop the mixer so you can scrape the sides. Add the sour cream and heavy cream and whisk until the mixture is smooth and fluffy, another minute more.

key lime cheesecake mixer batter


Slow and Steady Baking for the Perfect Texture

Pour this mixture on top of the crust. Bake for 10 minutes, then reduce the heat to 225 F. Bake for an additional 80 minutes, or just until you see the cake set when you give the pan a little wobble. Turn off the heat and crack open the oven door for an hour to let it cool slowly (this prevents cracking). Remove the cake from the oven and let it cool to room temperature before transferring it to the refrigerator to cool for at least three more hours.

cloud cheesecake baked in a springform pan cooling

Crafting a Zesty Lime Curd

While the cake is cooking or cooling is a perfect time to make the lime curd. To make the curd, first place a fine mesh strainer over a bowl. Keep this close as you’re making the curd: In a medium saucepan, whisk together the sugar, lime zest, lime juice, eggs, and a pinch of salt. Switch to a heat-proof rubber spatula and place this mixture over medium heat, moving the spatula in a figure-eight movement along the bottom of the pan, to ensure nothing sticks.

Cook for around five minutes, until the mixture thickens and coats the back of a spoon. This will happen quickly so keep a close eye on the curd. As soon as it thickens, pour the curd into your prepared fine mesh strainer over the bowl, scraping all of it from the pot. Pass the curd through the strainer into the bowl and whisk in the cold butter until it’s melted. Let this cool to room temperature, then reserve in the fridge until ready for serving.

key lime cheesecake lime zest topping

key lime cheesecake prepped topping in a bowl

Tips for Serving and Garnishing

To serve the cheesecake, use a small knife or offset spatula to carefully follow the perimeter of the springform pan separating the cake from the pan. Release the clip to remove the side ring. Spread some (or all) of the curd over the top of the cake with a rubber or off-set spatula, slice, and serve on its own or with some fresh whipped cream.

key lime cheesecake plated on a pedestal

Did you make this recipe?

Tag @highdeserttable on Instagram so we can cheer you on! 🌟

Nutrition values are estimates only. See the disclaimer here.

Mouthwatering Marinated Chicken Tacos: Discover the Secret to Taco Night

Marianne Sundquist · October 18, 2023 · Leave a Comment

Taco night in our house happens pretty much every week. Sometimes it feels like a miracle dinner because it’s a night when an array of toppings on the table work for everyone. We have a stack of white ramekins on the shelf. Usually, I fill all of them with small things that fit into tacos with ease—shredded cheese, avocado, onion, cilantro, sour cream, cucumbers, and blueberries (the kid’s favorite). I love to heat a large skillet, add a bit of butter and make “smashed tacos”, searing our filled tacos on each side until the tortilla gets crisp and the cheese is melted and bubbling.

Sometimes a rotisserie chicken, beans, or avocado work perfectly as the main taco filling. But when I have time, marinated chicken breasts and/or thighs are one of our favorites. When I was thinking about this recipe, I went to the grocery store planning on getting a dozen chicken thighs to marinate. Chicken thighs are a fattier cut of chicken, and are juicy and full of flavor. But when I arrived, chicken breasts were on sale and so I thought, why not test this marinade on what tends to be the driest cut of chicken? Standing in the middle of the store, I decided to go for it and I’m so glad I did. You can use chicken breasts, thighs, beef skirts, or flank steak.

Now, I don’t want to perpetuate chicken breasts’ dry reputation, so it’s important to take note of a few details. In this recipe, I use boneless, skinless chicken breasts because they are easy to grill, slice, and fill tacos with. But this is certainly the driest avenue to go when it comes to choosing what chicken to use. Bone-in, skin-on chicken breasts retain more moisture and don’t dry out nearly as fast. This marinade will work with any cut of chicken you want to try it with and various cooking methods.

Trust the marinade

One small detail that often gets overlooked is trusting the marinade has done its job. After marinating and before cooking, it’s a good idea to dry off the chicken with clean paper towels. This prevents grill flare-ups and burned areas and encourages a nice, even sear.

Something’s fishy

You’ll notice that this recipe calls for fish sauce, which might have you scratching your head, but this Southeast Asian condiment adds a subtle, umami seasoning punch to the marinade in the best of ways. The recipe also calls for an overnight marinade, but a few hours will still impart significant flavor benefits if you’re short on time. Here, I marinate six chicken breasts which is more than enough for a family of four, but it leaves some for leftovers over the next couple of days.

Print

Marinated Chicken Taco Night

Marinated Chicken grilled and ready for Taco Night
Print Recipe
Pin Recipe

5 Stars 4 Stars 3 Stars 2 Stars 1 Star

No reviews

Elevate your taco night with this flavorful marinated chicken tacos recipe. Learn tips for grilling juicy chicken breasts and discover the secret ingredient, fish sauce, for an umami punch.

  • Author: Marianne Sundquist
  • Prep Time: 12 hours
  • Cook Time: 30 mins
  • Total Time: 12.5 hours
  • Yield: 6-8 servings
  • Category: dinner
  • Method: marinate
  • Cuisine: Mexican

Ingredients

Units
  • 6 boneless skinless chicken breasts
  • 2 T. coriander seeds, lightly toasted
  • 2 limes, zested and juiced
  • 5 garlic cloves, peeled
  • 2 T. olive oil
  • 2 T. fish sauce
  • 2 T. honey
  • 1 c. cilantro leaves and stems, sliced though

Instructions

fresh ingredients ready for Chicken Taco Night


The chicken marinade

Place chicken breasts in a large bowl or container that is easy to cover. In a very dry blender place the lightly toasted coriander seeds and blend just until they are crushed but not completely pulverized. To the blender, add the lime zest and juice, garlic cloves, olive oil, fish sauce, honey, and cilantro. Blend this marinade until smooth and pour over the chicken, making sure to get the exterior of all the chicken breasts evenly coated. Cover the chicken, and place it on the bottom shelf of your refrigerator.

Let the chicken marinate for 3-12 hours.

Tip for safely storing marinating chicken

It’s super important to keep your hands and surfaces clean throughout the entire process when working with raw chicken. Placing raw chicken on the bottom shelf is important because if for any reason some raw chicken liquid spills or drips out, it eliminates the danger of it spilling on any food below it.

Grilling the chicken

Carefully pat the chicken breasts dry with clean paper towels and cook on a hot grill until the chicken is cooked to 165 F. Remove the chicken from the grill, cover, and let rest for ten minutes before slicing and serving.

Marinated Chicken on the grill
Marinated Chicken
on the grill

Nutrition

  • Calories: 3450

Did you make this recipe?

Tag @highdeserttable on Instagram so we can cheer you on! 🌟

Nutrition values are estimates only. See the disclaimer here.

Quick & Easy Pickled Rhubarb

Marianne Sundquist · October 11, 2023 · Leave a Comment

Sometimes a recipe is so quick and easy it doesn’t even feel like a whole recipe. But this recipe for quick and easy pickled rhubarb is not only perfectly complete, it also might be the most magical way to use rhubarb I have come across.

Rhubarb has always been one of my favorite fruits, and usually, the second I see it, I try to buy some as finding it sometimes feels as special as spotting an animal in the wild. I’ll usually make a coulis, slice it, and roast it with a squeeze of orange and honey. Or if I have time, I’ll make a pie with just rhubarb, or with the addition of strawberries.

Rhubarb, a springtime vegetable part of the buckwheat family, functions more like a fruit, resembling long stalks of red celery. When I think of celery the first thing I think about is the crunchy texture. But usually, rhubarb recipes are the opposite of crunchy. This recipe is a quick “pickle” where the rhubarb provides most of the acidity and in the process keeps its delightful texture.

Get creative

Feel free to get creative with flavors when making the pickling liquid. You could add vanilla bean, orange, lavender, rosemary, ginger, cinnamon, or even mint. It’s beautiful paired with ice cream, pancakes, and salad greens, but my favorite way to enjoy this is spooned over plain greek yogurt. The pickling liquid is a treat in itself added to sparkling water or in a cocktail. 

Print

Quick & Easy Pickled Rhubarb

Quick and Easy Pickled Rhubarb in a jar
Print Recipe
Pin Recipe

5 Stars 4 Stars 3 Stars 2 Stars 1 Star

No reviews

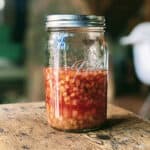
This fast and easy recipe for pickled rhubarb is not only perfectly complete, but it also might be the most magical way to use rhubarb I have come across. Use it on grilled meats, as a refreshing salad topping, or on a charcuterie plate.

  • Author: Marianne Sundquist
  • Prep Time: 10 mins
  • Cook Time: 5 mins
  • Total Time: 15 minutes
  • Yield: 2 cups
  • Category: pickles, jams, & preserves
  • Method: pickeling
  • Cuisine: american

Ingredients

Units
  • 3–5 stalks of rhubarb, depending on size
  • 3/4 c. sugar
  • 1 c. water
  • 1 juicy lemon, zested and juiced

Instructions

Trim ends and dice the rhubarb. Place them in a heat-proof glass jar.

In a medium saucepan over medium heat, bring the sugar, water, zest, and lemon juice to a boil.

Turn off the heat and carefully pour the hot liquid over the rhubarb. Use a spoon if needed to make sure the rhubarb is completely submerged in the liquid. Let this sit on the counter until it’s close to room temperature. Then cover and transfer to the fridge for around a day. The rhubarb will keep in the fridge for 2-3 weeks.

Did you make this recipe?

Tag @highdeserttable on Instagram so we can cheer you on! 🌟

Nutrition values are estimates only. See the disclaimer here.

Everyday Vinaigrette

Marianne Sundquist · June 23, 2023 · Leave a Comment

I love to keep a vinaigrette in the fridge for the week. It makes a lunchtime salad easy, it’s easy to grab for dipping raw vegetables in for a snack, sometimes I find myself drizzling some inside a sandwich or in a chicken, tuna, pasta, or grain salad, or on top of all types of grilled vegetables. The bottom line? A simple vinaigrette is more savvy and useful than it might appear.

Everyday Vinaigrette - fresh ingredients in a bowl

I know I’ve talked about it before, but this is a nook-and-cranny kind of dressing. I have to admit they are my favorite kind. Sure, they can be tossed with all kinds of greens but this kind of dressing functions at its best when it’s topically applied, meaning to spoon on top creating an uneven coating. 

Why in the world does anyone want an uneven coating of dressing you might be asking? It all comes down to the element of delight and surprise. Imagine you are eating a salad and with the first bite you taste some greens, some golden beets, and a bit of goat cheese and in general everything is lightly dressed in a bright, lemony vinaigrette. That salad sounds pretty good and as I write this, I’m starting to feel a bit hungry for lunch. Now, imagine you are eating another salad and with the first bite you taste some greens, some golden beets, a bit of goat cheese and then BAM, a burst of lemon, olive oil, honey, shallot, and some savory element you can’t describe (here it’s the garlic that’s mellowed in the olive oil and acid) has found a spot to hide inside a fold of greens. This is the delightful experience of a nook and cranny dressing. It’s the finely chopped shallot and garlic that gives the dressing the ability to concentrate flavors and hide. I sometimes use other ingredients to function in this way, like crushed grapes or diced apples. You’ll probably notice that the olive oil hardens in the fridge. Just remove the jar about 15 minutes before using or run the sealed jar under hot water for a minute.

This is the dressing I make most often and never measure the ingredients. The lemon juice is interchangeable with many kinds of vinegar like red wine vinegar, white wine vinegar, champagne vinegar, and rice wine vinegar. I encourage you to try this by either following the recipe or not. I have complete faith that your eyes and your mouth will guide you.

Everyday Vinaigrette chopped ingredients
Print

Everyday Vinaigrette

Everyday Lemon Vinaigrette ready to serve
Print Recipe
Pin Recipe

5 Stars 4 Stars 3 Stars 2 Stars 1 Star

No reviews

This everyday lemon vinaigrette makes a lunchtime salad simple, it’s easy to grab for dipping raw vegetables in for a snack, sometimes I find myself drizzling some inside a sandwich or in a chicken, tuna, pasta, or grain salad, or on top of all types of grilled vegetables. The bottom line? An everyday vinaigrette is more savvy and useful than it might appear.

  • Author: Marianne Sundquist
  • Prep Time: 15 mins
  • Cook Time: 0 mins
  • Total Time: 15 mins
  • Yield: 1 cup
  • Category: Salads
  • Method: chop
  • Cuisine: French

Ingredients

Units
  • 1–2 shallots, depending on size, finely chopped
  • 2 garlic cloves, finely chopped
  • 1/4 c. freshly squeeze lemon juice
  • 1/3 c. extra virgin olive oil
  • 1 T. honey
  • 1 T. dijon mustard

Instructions


Chop what needs chopping, squeeze what needs squeezing, and whisk all ingredients together and store in the refrigerator for up to a week. So simple, so easy. You’re a pro!

Did you make this recipe?

Tag @highdeserttable on Instagram so we can cheer you on! 🌟

Nutrition values are estimates only. See the disclaimer here.

Spicy Mezcal Margarita

Marianne Sundquist · June 12, 2023 · Leave a Comment

Oh, the joys of summertime margaritas! There is something about the smokey addition of Mezcal that just tastes right here in the Southwest. My husband seems to have always had an affinity for Mezcal, preferring to sip it neat, while I first realized how much I loved it after ordering a Mezcal Ranch Water at La Reina at El Rey Court. To be honest, I usually prefer wine, that is until I find myself somewhere with Margaritas on the menu. When entertaining (or just wanting a fun cocktail for the weekend) I love to make everything as relaxed and easy as possible. This Small Batch Mezcal Margarita is a wonderful way to go. 

At first, one might be inclined to think (me until about ten minutes ago) that Mezcal is a type of Tequila. But in reality, Tequila is a type of Mezcal, defined as any agave-based spirit. While Mezcal is produced across eight states in Mexico, 85% of all Mezcal is produced in the Mexican state of Oaxaca. What differentiates Mezcal from Tequila is not only the “terroir” of where the plant has grown and matured, but also the process in which it’s made. Mezcal’s classic smokiness comes from slowly cooking the heart of the agave plant, piñas, in earthen pits lined with wood and rocks and covered to keep in the heat. When I saw photos of this process, I couldn’t help but notice the similarities between this method and cooking a pig underground, or a clam bake on a beach. The first oven, as it has been for thousands of years, never disappoints in utility and hints of mystery. No wonder when I sip on Mezcal it somehow feels like I’m tasting a time and place in a single sip. 

This recipe uses one part tequila and one part mezcal to soften the smokiness in the cocktail. This being said the smokiness of Mezcal varies greatly depending on the producer, so use your best judgment. We love Del Maguey’s Vida Clásico but there are so many great choices out there. You can easily skip the tequila and use 8 oz. of Mezcal in this recipe for a bit more smoke. I love a salted rim and always a big slice of jalapeno if I have one on hand. Even though this recipe serves four people, it can easily be stretched to serve more people and lightened up by adding sparkling water, making a light and bubbly version.

Print

Spicy Mezcal Margarita

Mezcal Margarita in a glass with a jalapeño slice
Print Recipe
Pin Recipe

5 Stars 4 Stars 3 Stars 2 Stars 1 Star

No reviews

This spicy mezcal margarita combines the smoky and earthy notes of mezcal with the bright and tangy flavors of lime. Sit back and vibe out with friends with the smoldering allure that elevates this classic margarita experience.

  • Author: Marianne Sundquist
  • Prep Time: 10 mins
  • Cook Time: 0 mins
  • Total Time: 10 minutes
  • Yield: 4 servings
  • Category: Cocktails
  • Method: mix
  • Cuisine: Mexican

Ingredients

Units
  • 4 oz. tequila
  • 4 oz. mezcal
  • 5 oz. cointreau
  • 4 oz. fresh lime juice
  • for garnish: medium coarse salt, lime wedges, jalapeno slices (optional)

Instructions

In a glass jar, stir together tequila, mezcal, cointreau, and fresh lime juice. Refrigerate until you’re ready to serve. This mixture will keep for a few days. When ready to serve, If you want a salted rim, pour salt into a small, saucer-sized plate, rub a lime wedge around the entire or part of the rim, dip the rim of the glass into the salt, and add ice to each glass. Pour the mixed cocktail over ice and enjoy. Garnish with lime and/or jalapeno slices

Did you make this recipe?

Tag @highdeserttable on Instagram so we can cheer you on! 🌟

Nutrition values are estimates only. See the disclaimer here.

Mezcal Margarita slicing the limes
  • Page 1
  • Page 2
  • Page 3
  • Go to Next Page »

High Desert Table

Copyright © 2025 · High Desert Table

  • Privacy Policy
  • Nutrition Disclaimer