
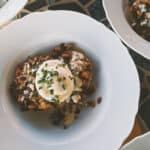
Calabacitas is wonderful in a bowl on its own, but it also happens to make my favorite southwestern style benedict of all time. This is a vegetarian recipe, but you could always add a slice of ham or bacon on top of the bread if you wish.
spring
Spring Chicken Posole Verde

When I spooned up a bowl of this Spring Posole for my husband last week, the first thing he said was “this tastes like New Mexico”. I cannot think of a better compliment than this.
Red Chile & Caramelized Onion Dip

This creamy, red-chile caramelized onion dip is perfect for crackers, sandwiches, crusty bread, charcuterie, and all the vegetables you can think of. Made with New Mexico Red Chiles, this appetizer is perfect for any party, picnic, or southwest gathering.
High Altitude Chocolate Cake with Cream Cheese Frosting
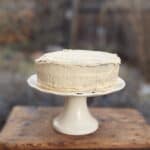
Baking at higher altitudes can be an unpredictable challenge. This luscious chocolate cake is perfect for your high-elevation baking adventures.
Cochinita Pibil Chile Tacos

This is a slow-cooker taco recipe that comes from our constant craving for the unequivocal Cochinita Pibil sandwich and our never-ending love for tacos.