• Skip to primary navigation
  • Skip to main content
High Desert Table

High Desert Table

Your everyday guide to Southwestern cooking

  • Home
  • Recipes
  • About
  • Shop
  • Private Events
  • Contact
  • Show Search
Hide Search

spring

Quick & Easy Pickled Rhubarb

Marianne Sundquist · October 11, 2023 · Leave a Comment

Sometimes a recipe is so quick and easy it doesn’t even feel like a whole recipe. But this recipe for quick and easy pickled rhubarb is not only perfectly complete, it also might be the most magical way to use rhubarb I have come across.

Rhubarb has always been one of my favorite fruits, and usually, the second I see it, I try to buy some as finding it sometimes feels as special as spotting an animal in the wild. I’ll usually make a coulis, slice it, and roast it with a squeeze of orange and honey. Or if I have time, I’ll make a pie with just rhubarb, or with the addition of strawberries.

Rhubarb, a springtime vegetable part of the buckwheat family, functions more like a fruit, resembling long stalks of red celery. When I think of celery the first thing I think about is the crunchy texture. But usually, rhubarb recipes are the opposite of crunchy. This recipe is a quick “pickle” where the rhubarb provides most of the acidity and in the process keeps its delightful texture.

Get creative

Feel free to get creative with flavors when making the pickling liquid. You could add vanilla bean, orange, lavender, rosemary, ginger, cinnamon, or even mint. It’s beautiful paired with ice cream, pancakes, and salad greens, but my favorite way to enjoy this is spooned over plain greek yogurt. The pickling liquid is a treat in itself added to sparkling water or in a cocktail. 

Print

Quick & Easy Pickled Rhubarb

Quick and Easy Pickled Rhubarb in a jar
Print Recipe
Pin Recipe

5 Stars 4 Stars 3 Stars 2 Stars 1 Star

No reviews

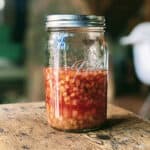
This fast and easy recipe for pickled rhubarb is not only perfectly complete, but it also might be the most magical way to use rhubarb I have come across. Use it on grilled meats, as a refreshing salad topping, or on a charcuterie plate.

  • Author: Marianne Sundquist
  • Prep Time: 10 mins
  • Cook Time: 5 mins
  • Total Time: 15 minutes
  • Yield: 2 cups
  • Category: pickles, jams, & preserves
  • Method: pickeling
  • Cuisine: american

Ingredients

Units
  • 3–5 stalks of rhubarb, depending on size
  • 3/4 c. sugar
  • 1 c. water
  • 1 juicy lemon, zested and juiced

Instructions

Trim ends and dice the rhubarb. Place them in a heat-proof glass jar.

In a medium saucepan over medium heat, bring the sugar, water, zest, and lemon juice to a boil.

Turn off the heat and carefully pour the hot liquid over the rhubarb. Use a spoon if needed to make sure the rhubarb is completely submerged in the liquid. Let this sit on the counter until it’s close to room temperature. Then cover and transfer to the fridge for around a day. The rhubarb will keep in the fridge for 2-3 weeks.

Did you make this recipe?

Tag @highdeserttable on Instagram so we can cheer you on! 🌟

Nutrition values are estimates only. See the disclaimer here.

Everyday Vinaigrette

Marianne Sundquist · June 23, 2023 · Leave a Comment

I love to keep a vinaigrette in the fridge for the week. It makes a lunchtime salad easy, it’s easy to grab for dipping raw vegetables in for a snack, sometimes I find myself drizzling some inside a sandwich or in a chicken, tuna, pasta, or grain salad, or on top of all types of grilled vegetables. The bottom line? A simple vinaigrette is more savvy and useful than it might appear.

Everyday Vinaigrette - fresh ingredients in a bowl

I know I’ve talked about it before, but this is a nook-and-cranny kind of dressing. I have to admit they are my favorite kind. Sure, they can be tossed with all kinds of greens but this kind of dressing functions at its best when it’s topically applied, meaning to spoon on top creating an uneven coating. 

Why in the world does anyone want an uneven coating of dressing you might be asking? It all comes down to the element of delight and surprise. Imagine you are eating a salad and with the first bite you taste some greens, some golden beets, and a bit of goat cheese and in general everything is lightly dressed in a bright, lemony vinaigrette. That salad sounds pretty good and as I write this, I’m starting to feel a bit hungry for lunch. Now, imagine you are eating another salad and with the first bite you taste some greens, some golden beets, a bit of goat cheese and then BAM, a burst of lemon, olive oil, honey, shallot, and some savory element you can’t describe (here it’s the garlic that’s mellowed in the olive oil and acid) has found a spot to hide inside a fold of greens. This is the delightful experience of a nook and cranny dressing. It’s the finely chopped shallot and garlic that gives the dressing the ability to concentrate flavors and hide. I sometimes use other ingredients to function in this way, like crushed grapes or diced apples. You’ll probably notice that the olive oil hardens in the fridge. Just remove the jar about 15 minutes before using or run the sealed jar under hot water for a minute.

This is the dressing I make most often and never measure the ingredients. The lemon juice is interchangeable with many kinds of vinegar like red wine vinegar, white wine vinegar, champagne vinegar, and rice wine vinegar. I encourage you to try this by either following the recipe or not. I have complete faith that your eyes and your mouth will guide you.

Everyday Vinaigrette chopped ingredients
Print

Everyday Vinaigrette

Everyday Lemon Vinaigrette ready to serve
Print Recipe
Pin Recipe

5 Stars 4 Stars 3 Stars 2 Stars 1 Star

No reviews

This everyday lemon vinaigrette makes a lunchtime salad simple, it’s easy to grab for dipping raw vegetables in for a snack, sometimes I find myself drizzling some inside a sandwich or in a chicken, tuna, pasta, or grain salad, or on top of all types of grilled vegetables. The bottom line? An everyday vinaigrette is more savvy and useful than it might appear.

  • Author: Marianne Sundquist
  • Prep Time: 15 mins
  • Cook Time: 0 mins
  • Total Time: 15 mins
  • Yield: 1 cup
  • Category: Salads
  • Method: chop
  • Cuisine: French

Ingredients

Units
  • 1–2 shallots, depending on size, finely chopped
  • 2 garlic cloves, finely chopped
  • 1/4 c. freshly squeeze lemon juice
  • 1/3 c. extra virgin olive oil
  • 1 T. honey
  • 1 T. dijon mustard

Instructions


Chop what needs chopping, squeeze what needs squeezing, and whisk all ingredients together and store in the refrigerator for up to a week. So simple, so easy. You’re a pro!

Did you make this recipe?

Tag @highdeserttable on Instagram so we can cheer you on! 🌟

Nutrition values are estimates only. See the disclaimer here.

Mushroom, Poblano & Goat Cheese Frittata

Marianne Sundquist · June 11, 2023 · Leave a Comment

If you’re ever tasked with making breakfast, brunch, or lunch for a crowd, this frittata (an Italian unfolded omelet) recipe might be right up your alley. I’m not sure it gets easier than this. No eggs cooked to order. The vegetables can be easily cooked the day before, and all that’s required is a quick whisk of the eggs (not too much so there is not a deflation of air during baking), a sprinkling of vegetables and cheese before throwing it in the oven for less than a half hour and voila! 

But that’s not all. Frittatas can be served any time of the day, as a hot main course or cool added to the middle of a sandwich or sliced and served as an appetizer alongside a variety of antipasto as the women in my family would say. In fact, you can make the entire frittata in advance and reheat it the next day by placing it covered in foil, in a 350 F. oven for 15 minutes or until it’s heated all the way through. If reheating individual slices (like when you have leftovers), I like to place a splash of water in the bottom of a small baking dish before adding slices and then covering them. This creates a bit of steam during reheating and prevents the edges from drying out. Another (and opposite) popular method of reheating slices is to fry them in a skillet on the stove, embracing and encouraging the sides to crisp up.

This simple flavor combination of mushroom, red onion, poblano, goat cheese, and basil is just one combination. Whenever making a frittata I usually ask myself a couple of questions: What do I have that I need to use up that is at risk for going to waste? And, what is amazing right now because of the season we are in? In the late fall, winter, and early spring, I will rummage in the freezer looking for frozen chiles and sweet corn I’ve squirreled away. I can promise you that if I had any corn left I would have added it here. But I found poblanos in the freezer and goat cheese in the fridge, so this is where I began. Please consult the most important person when considering what veggies and things to add to your frittata (You!). What do you love? What’s in your fridge? What can you access at the grocery store or farmers market? 

The most important thing to remember is that in any baked egg dish, water causes problems. Because of this, it’s important that vegetables and meat are cooked before adding them to your egg mixture.

If you’re serving this as a main course, it pairs well with a simple green salad and fresh fruit, or you can make it a party and serve this with a decadent baked French toast (like the one I shared last week) or an assortment of pastries.

Print

Mushroom, Poblano & Goat Cheese Frittata

HDT - Sq - Goat Cheese Frittata - in a rustic bowl ready for brunch
Print Recipe
Pin Recipe

5 Stars 4 Stars 3 Stars 2 Stars 1 Star

No reviews

If you’re ever tasked with making breakfast, brunch, or lunch for a crowd, this frittata recipe might be right up your alley. I’m not sure it gets easier than this. No eggs cooked to order. The vegetables can be easily cooked the day before, and all that’s required is a quick whisk of the eggs, and a sprinkling of vegetables and cheese before throwing it in the oven for less than a half hour and voila!

  • Author: Marianne Sundquist
  • Prep Time: 30 mins
  • Cook Time: 30 mins
  • Total Time: 1 hour
  • Yield: 6-8 servings
  • Category: Breakfast
  • Method: bake
  • Cuisine: Italian

Ingredients

Units

For the vegetables:

  • 3 T. butter
  • 1 lb. fresh cremini mushrooms (aka baby bellas), cleaned with a dry kitchen towel and sliced
  • 1 medium red onion, sliced
  • Salt and pepper, to taste
  • 2 fire-roasted poblanos, peeled, seeded and diced

For the frittata:

  • 2 T. butter
  • 12 large eggs
  • 1/4 c. heavy cream
  • 1 t. Kosher or large flaked sea salt
  • 1 c. fresh goat cheese
  • torn basil leaves, for garnish


Instructions

The mushrooms

In a large saute pan over medium-high heat, add the butter. Once it’s melted, add the mushrooms and onions with a generous pinch of salt and pepper. Let them cook until the water inside them releases and evaporates, at which point both mushrooms and onions will begin to caramelize. Let them cook until they are a deep, golden brown, and turn off the heat. Transfer to a small bowl and add the diced poblanos. Reserve until you are ready to bake the frittata.

Baking the frittata

To cook the frittata, preheat the oven to 375 F. In a large bowl or pitcher, whisk together the eggs, cream, and salt. Place butter in a 10 to 12-inch cast iron skillet or a baking dish that’s approximately the same size. Place the skillet in the oven for around 5 minutes, or until the butter is completely melted. Carefully remove the skillet from the oven and swirl (or brush) the butter around so the bottom and sides are coated. Pour in the egg mixture in the skillet, and sprinkle in the cooked vegetables and fresh goat cheese. Bake for around 25 minutes, or until the frittata doesn’t wobble in the middle. You don’t want to overbake it, but you don’t want undercooked eggs on the inside either. You can also insert a small knife in the center. If it comes out clean you are good to go.


To serve, garnish with torn basil leaves and enjoy.

Did you make this recipe?

Tag @highdeserttable on Instagram so we can cheer you on! 🌟

Nutrition values are estimates only. See the disclaimer here.

Mushroom, poblano, and goatcCheese Frittata in a rustic bowl ready for brunch

Citrus Salad with Crispy Prosciutto

Marianne Sundquist · May 27, 2023 · Leave a Comment

All week I have been excited to share this recipe with you. It’s a recipe that celebrates where we are now, the tail end of winter with spring right around the corner. There’s no doubt the growing season will bring all sorts of incredible fruits to enjoy, but amid all this fruit and vegetable anticipation, sometimes it’s easy to forget that the winter gives us gifts too, the bright delights of citrus. 

This salad is easy to make but doesn’t taste like it. When I worked in restaurants, this is the exact kind of salad I would put on a menu. At the end of the day, we are all chefs of our home kitchens. All that’s needed is trust in ingredients and trust in ourselves. The rest follows with tasting and practice. 

Many Chefs I know say the same thing, the longer they cook in restaurants and the more they travel and explore the furthest horizons of creativity, eventually they find their way back (often after many years), to a simpler approach to cooking. Not out of lack of inspiration or drive, but in pursuit of flavor. This is one of those recipes. Where simplicity and ease intersect with flavor and every ingredient has a role to play— the romaine is clean and crunchy, arugula adds a hint of pepper, the sharp bite of radicchio plays against the bright acidity of the orange and grapefruit, crispy prosciutto adds texture and a perfect hit of salt, while the parmesan and shallot act as very good friends, keeping the salad grounded and sensible. Did you know a salad could do all that? Well, it can. And now you can make it and delight in the perfection of simple cooking, hopefully with as much confidence as any Chef.

Although I should offer a warning. If you make this as a side salad (which you totally can do!), just be prepared for folks at the table to not want anything else. This salad pairs beautifully with avocado, grilled chicken, salmon, shrimp, or even seared scallops.

Print

Citrus Salad with Crispy Prosciutto

HDT Citrus Salad with Crispy Prosciutto plated and ready for the table
Print Recipe
Pin Recipe

5 Stars 4 Stars 3 Stars 2 Stars 1 Star

No reviews

This citrus salad is easy to make but doesn’t taste like it. The romaine is clean and crunchy, arugula adds a hint of pepper, the sharp bite of radicchio plays against the bright acidity of the orange and grapefruit, crispy prosciutto adds texture and a perfect hit of salt, while the parmesan and shallot act as very good friends, keeping the salad grounded and sensible.

  • Author: Marianne Sundquist
  • Prep Time: 10 mins
  • Cook Time: 15 mins
  • Total Time: 25 minutes
  • Yield: 4 servings
  • Category: Salad
  • Method: Chop
  • Cuisine: American

Ingredients

Units

For the prosciutto chips:

  • 4 oz. Prosciutto slices, torn into pieces
  • 1 t. olive oil

For the vinaigrette:

  • 1 Orange
  • 1 pink Grapefruit
  • 1 shallot, finely chopped
  • 1/4 c. Extra virgin olive oil
  • Sea salt, black pepper, and red chile flakes to taste

For the salad:

  • 1/2 head of radicchio, sliced
  • 1 bunch of romaine, sliced
  • 3 c. arugula
  • Small handful of fresh basil leaves, thinly sliced
  • parmesan cheese shaved with a vegetable peeler into curls


Instructions

Making the prosciutto

Make the prosciutto chips: Preheat the oven to 375 F. Line a baking sheet with parchment paper and lay out the prosciutto in a single layer. Rub the olive oil over top and bake until they are bubbling and crispy, around 15 minutes. Transfer the prosciutto to a bowl and reserve.

Citrus Salad with the Prosciutto prepped on a baking sheet

Making the vinaigrette

To make the vinaigrette the first thing we need to do is cut the orange and grapefruit into segments. With a sharp knife, trim both ends of each piece of fruit. Set a flat side of the orange on the cutting board. Remove the peel by cutting around the orange, following the shape of the sphere. Discard the peels and now you’re ready to slice segments: Set the fruit on its side in a shallow bowl. Cut toward the center, along a membrane. Then slice along the adjacent membrane until the cuts meet, releasing the segment. Transfer the segment to a bowl. Repeat until all segments are in the bowl. Squeeze the juice out of the remaining orange membranes, picking out any seeds as you go. Reserve juice and fruit for serving. Repeat this for the grapefruit. By the end, you will have a bowl of orange and grapefruit segments and juice. Add the shallot, extra virgin olive oil, a pinch of salt, black pepper, and red chile flakes to taste. Reserve.

Citrus Salad fruit segmented and ready for thebowl

Making the salad

To make the salad: Gently toss the vinaigrette with the radicchio, romaine, arugula, and basil. Take a taste and add more salt, pepper, or red chile flakes if needed. Garnish the top with crispy prosciutto and parmesan curls.

Citrus Salad with Prosciutto greens chopped in a bowl

Did you make this recipe?

Tag @highdeserttable on Instagram so we can cheer you on! 🌟

Nutrition values are estimates only. See the disclaimer here.

Calabacitas Benedict

Marianne Sundquist · May 22, 2023 · Leave a Comment

Calabacitas “little squash”, is a dish with many names, and variations and steeped in New Mexico history originating from Native American Pueblos dating back to the 16th century. As with most foods unique to this area, the finished dish is only the starting point for the many opportunities to learn about the foods, people, and history that make up the heart and soul of the Southwest landscape. Each new ingredient and method I learn here change me, even in a small way. Added together, I can’t help but notice that living and cooking here has changed and grounded me in ways I could have ever imagined where the only thing I know for sure, is that I hope I will be learning here with an open heart for the rest of my life. Cooking becomes less about what I do in the kitchen and more about what others have experienced, preserved, and the gift of gathering around the kitchen table to share a dish like this. 

Sacred Ingredients

In her James Beard Award-winning book, Foods of the Southwest Indian Nation, Lois Ellen Frank (Kiowa on her mother’s side and Sephardic on her father’s side) writes about the sacred elements to tribes across the country and the ingenuity of an ecosystem that is created by planting three crops that benefit and thrive when they are planted together in companion planting. This book also happens to include the largest acknowledgments section of any book I have ever seen. I don’t think this is by accident, and if I’ve learned anything at all since my time here learning from chefs like Lois and Walter Whitewater from Red Mesa Cuisine, it’s that the native approach to cooking embodies a spirit of attention and care for all living things including land and food, with a deep appreciation for teachers in all forms.  

Of the three sisters, Lois writes that they “are believed to have been domesticated in Mesoamerica sometime between 7000 and 3000 B.C.” Then, as travel increased along the El Camino Real de Tierra Adentro, the 1591-mile-long road between Mexico City and San Juan Pueblo, New Mexico, it is believed corn and chile was added to cooked summer squash making the combination we know and love today. In Lois’s book the recipe, also called calabacitas, is called Mesa Squash Fry and includes red bell pepper and sunflower seeds. In the Pueblo Indian Cookbook, compiled and edited by Phyllis Hughes a similar version is called Skillet Squash and includes the addition of shredded longhorn cheese (cheddar or american style cheese in the shape of a half moon), while Fabiola C. Gilbert in her book Historic Cookery published in 1931 refers to Calabacitas con Chile Verde which includes a small amount of milk and grated Native or American cheese. I have seen more variations than I can count with additions like tomatoes, chicken broth, cream, queso fresco, jalapeno, and differences in texture from extra brothy to this version which is more on the caramelized vegetable side.

Making the Calabacitas

Calabacitas is wonderful in a bowl on its own, but it also happens to make my favorite benedict of all time. This is a vegetarian recipe, but you could always add a slice of ham or bacon on top of the bread if you wish. Or, if you didn’t want to use biscuits or english muffins, you could always swap those out for roasted fingerling potatoes, sweet potatoes, roasted asparagus or a bed of sauteed hearty greens like kale, chard or collards. 

The classic way of preparing hollandaise sauce is by using a double boiler and saying lots of prayers while whisking. This blender version can be made with a standard blender or an immersion blender and is so easy you might be inclined to add this to your regular brunch rotation.

Print

Calabacitas Benedict

HDT Calabacitas Benedict plated
Print Recipe
Pin Recipe

5 Stars 4 Stars 3 Stars 2 Stars 1 Star

No reviews

Calabacitas is wonderful in a bowl on its own, but it also happens to make my favorite southwestern style benedict of all time. This is a vegetarian recipe, but you could always add a slice of ham or bacon on top of the bread if you wish.

  • Author: Marianne Sundquist
  • Prep Time: 30 mins
  • Cook Time: 30 mins
  • Total Time: 1 hour
  • Yield: 6 servings
  • Category: Breakfast
  • Method: fire-roasted
  • Cuisine: New Mexican

Ingredients

Units

for the calabacitas:

  • 2 T. olive oil
  • 1 red onion, diced
  • 3–4 cloves of garlic, finely chopped
  • 2 fire roasted poblano peppers, peeled, seeded and diced
  • 2 medium zucchini, diced
  • 2 medium yellow squash
  • 2 c. fire roasted corn kernels
  • 1 T. fresh oregano, rough chopped (or 2 t. dry)
  • salt and pepper, to taste

for the hollandaise:

  • 2 1/2 sticks unsalted butter
  • 2 large egg yolks
  • 2 T. freshly squeezed lemon juice
  • 1/2 t. New Mexico Red Chile Powder or to taste
  • Salt and pepper, to taste
  • warm water, as needed for thinning

for serving:

  • 6–12 eggs, prepared however you like them best
  • 6 english muffins or biscuits, sliced in half, toasted and buttered
  • 1/4 c. minced chives, for garnish


Instructions

To make the calabacitas, heat the olive oil in a large, heavy-bottomed pan over medium-high heat. Add the onion and cook until they are beginning to caramelize. Add the garlic and cook for another couple of minutes. Now add the fire-roasted poblanos, zucchini, yellow squash, corn and oregano. Let this cook, stirring occasionally until the vegetables are tender, all of the water has evaporated from the zucchini and yellow squash and everything in the pan is starting to caramelize. Season with salt and pepper until it tastes wonderful to you. Keep warm.

Less than 30 minutes before serving the benedict is the time to make the hollandaise. Fill your blender with very warm water. In a small saucepan over medium heat bring the butter to a simmer and turn off the heat. Pour out the water from the blender, saving it for another use like watering plants once it comes to room temperature and dry the blender with a clean cloth. Transfer the butter to a heat-proof pitcher or measuring cup with a pouring spout to have ready to go. Add the egg yolks, lemon juice, New Mexico chile powder and a pinch of salt and pepper to the blender. Blend this on a medium speed and while it’s blending, carefully remove the fill cap from the blender lid and very slowly pour in the hot butter. Watch the mixture as you pour, you should see it thicken as it emulsifies. Once all the butter has been added, season with salt and pepper as needed. If the hollandaise is too thick, you can thin it out by blending in more lemon juice if you feel it’s needed or one tablespoon of warm water at a time. Transfer the sauce to a heat proof container and keep covered and warm until ready to serve.

To assemble the benedict:  Place English muffins or biscuits in a large bowl, top generously with a spoon of calabacitas, an egg and a drizzle of hollandaise sauce. Garnish with chives and serve immediately.

Did you make this recipe?

Tag @highdeserttable on Instagram so we can cheer you on! 🌟

Nutrition values are estimates only. See the disclaimer here.

  • Page 1
  • Page 2
  • Page 3
  • Go to Next Page »

High Desert Table

Copyright © 2025 · High Desert Table

  • Privacy Policy
  • Nutrition Disclaimer