
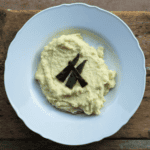
Discover the perfect blend of creamy French-style pomme puree and spicy green chile in this Poblano Potato Puree recipe. Learn how to achieve smooth, luscious mashed potatoes with a flavorful twist of poblanos and garlic.
Caramelized Onion & Red Chile Gravy
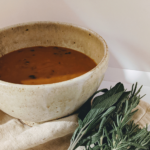
This make-ahead red chile gravy made with homemade turkey stock is the ultimate stress-free Thanksgiving side.
Key Lime Cheesecake with Gingersnap Crust

This key lime cheesecake combines the tangy brightness of key lime pie with the creamy decadence of cheesecake, all on a crunchy gingersnap crust.
Fire-Roasted Green Chile Risotto

Discover the joy of making the perfect risotto with fire-roasted green chiles. This risotto can be served on its own, or paired with roasted wild mushrooms, roasted vegetables, and a variety of fish or meat. It can be served as a side dish but is perfectly delightful for the entire dinner.
Green Chile Stacked Enchiladas

Spice up your dinner routine with this easy-to-follow and mouthwatering green chile stacked enchiladas recipe. This authentic recipe features roasted New Mexico or Anaheim Green Chiles, flavorful corn tortillas, succulent rotisserie chicken, and a generous layer of melted Jack Cheese.