• Skip to primary navigation
  • Skip to main content
High Desert Table

High Desert Table

Your everyday guide to Southwestern cooking

  • Home
  • Recipes
  • About
  • Shop
  • Private Events
  • Contact
  • Show Search
Hide Search

chile

Green Chile Stacked Enchiladas

Marianne Sundquist · January 24, 2024 · Leave a Comment

It’s a humbling and majestic thing to live in New Mexico as an Italian chef from the Midwest. It’s like landing on a different culinary planet. A planet where flavors transcend, reach deeply into the land and sky, and then reappear in a simmering pot of green chile sauce.

Enchanted lavender

A good example of this is lavender. I mostly had experienced lavender in restaurant kitchens as an unexpected flavor profile meant to wow guests, or by getting a whiff from a lotion or candle in a city shop. For almost twenty years I considered it to be my least favorite smell and taste. Then four years ago I moved to New Mexico. There were two different varieties of lavender in my yard and they smelled nothing like I expected. The high floral notes were grounded with traces of grass and wood, soft musk, and worn leather. The flowers were not alone like I had often seen them. They were part of a family, connected to long green stalks and twisting roots. They were growing next to chives and mint. Honeysuckle grew a few feet away. Sometimes there were other scents too, like roasting chiles and pinion fires wafting around and through wooden fence slats from neighboring yards. In the summer with all these high desert scents bumping and bouncing off each other, for the first time, lavender didn’t just make sense and smell good. I was enchanted. It became one of my favorite flavors of all time.

The Southwest is a melting pot

Because of this interconnected Southwest ecosystem where history, ingredients, landscape, and people meet, learning about New Mexican food feels like an extraordinary gift. With Christmas around the corner, I wanted to share a very special recipe from a very special Chef. Over the past number of months, I have had the privilege of learning about Native New Mexican cuisine from Dr. Lois Ellen Frank and Walter Whitewater through virtual culinary tours hosted by Heritage Inspirations. Lois has spent over 25 years documenting the foods and lifeways of Native American tribes from the Southwest and regions throughout the Americas. In 2007, she started a Native American Cuisine catering company named Red Mesa. I’m so grateful she was willing to share her recipes for Green Chile sauce, Tortillas, and Stacked Enchiladas with us here.

Since the pandemic Red Mesa has gone virtual and is offering hands-on cook-along cooking classes, demonstration-style cooking classes, and holiday family classes, along with a beautiful collection of local food products, cookbooks, and posters available on the website.

“When you cook together as a family, it unifies your bond and calls in the wisdom of the ancestors.”

Lois Ellen Frank
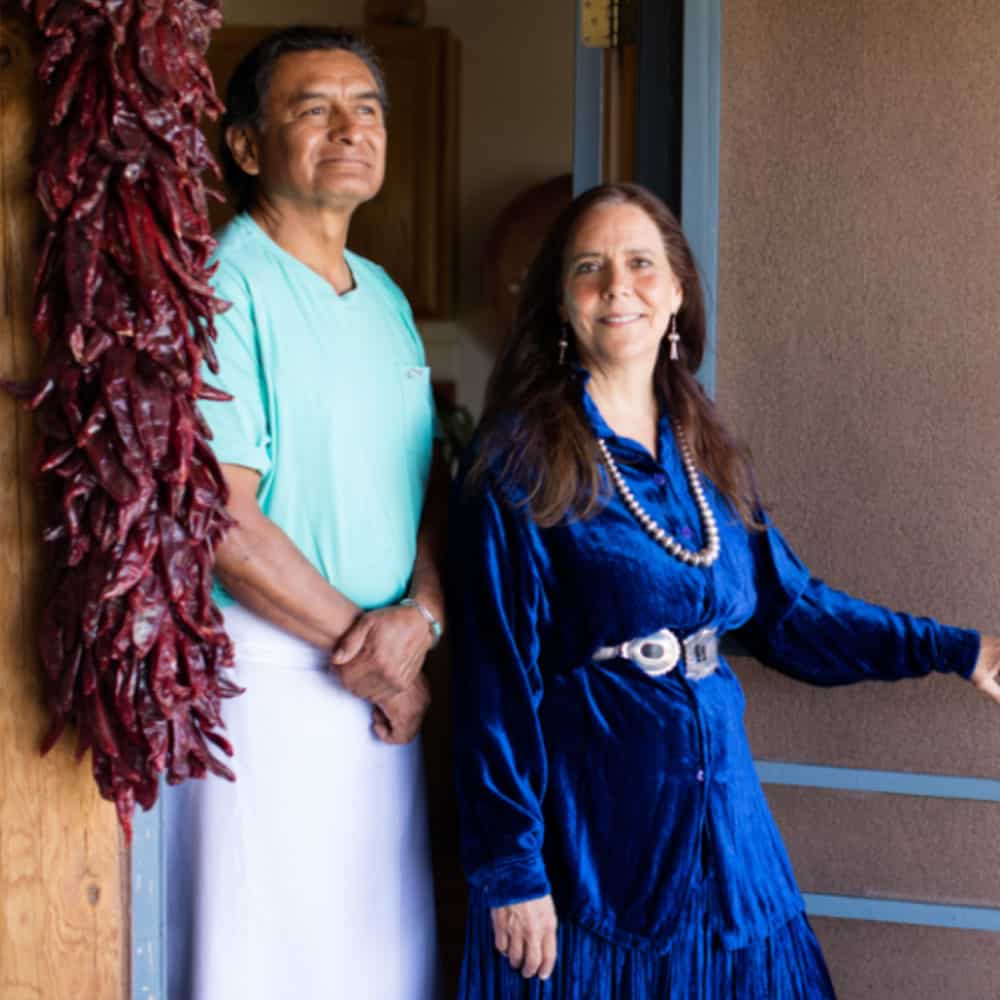
 Lois Ellen Frank and Walter Whitewater
Print

Green Chile Stacked Enchiladas

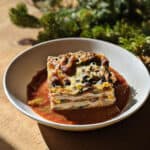
Green Chile Stacked Enchiladas - Plated with sauce
Print Recipe
Pin Recipe

5 Stars 4 Stars 3 Stars 2 Stars 1 Star

No reviews

Spice up your dinner routine with this easy-to-follow and mouthwatering green chile stacked enchiladas recipe. This authentic recipe features roasted New Mexico or Anaheim Green Chiles, flavorful corn tortillas, succulent rotisserie chicken, and a generous layer of melted Jack Cheese.

  • Author: Marianne Sundquist
  • Prep Time: 1 hour
  • Cook Time: 30 mins
  • Total Time: 1.5 hours
  • Yield: 10-12 servings
  • Category: Dinner
  • Method: Bake
  • Cuisine: New Mexican

Ingredients

Units

For the Green Chile Sauce: 

  • 6 cups New Mexico or Anaheim Green Chiles, Roasted, Peeled, & Chopped
  • 1 28 oz can chopped tomatoes
  • 1 Tablespoons Sunflower Oil
  • 1 Medium White Onion, diced (approximately 2 cups)
  • 1 Tablespoon chopped garlic (approximately 6 to 8 cloves)
  • 2-teaspoons kosher salt
  • 1/4 teaspoon freshly ground black pepper
  • 2 cups water


For the Corn Tortillas: 

  • 3 cups Corn Masa Flour for Tortillas (this can be found in your supermarket in the Latin food section)
  • 1 1/2 teaspoons kosher salt (or to taste)
  • 1 1/2 cups warm water


For the Enchiladas: 

  • 1 Rotisserie Chicken, (meat picked from the bones)
  • 4 3/4 cups Jack Cheese, grated

Instructions

Make the Green Chile Sauce

Using the open flame method, roast the green chiles until completely charred and then place in a glass or metal bowl covered with plastic wrap to allow the chiles to sweat and cool down. Once the chiles have cooled, peel, seed, and chop them.

In a medium size saucepan, heat the sunflower oil until hot but not smoking. Sauté the onion over medium to high heat until it begins to brown. About 3 minutes. Add the garlic and sauté for another minute. Add the tomatoes and cook for another 5 minutes stirring to prevent burning. Add the chopped green chile and sauté for another 3 minutes. Add the water and bring to a boil. Reduce the heat and simmer for approximately 15 minutes.

Add the salt and pepper to taste. Remove from heat.

In a blender place half the sauce and blend on high for several minutes until completely smooth. Return the blended mixture to the saucepan with the unblended sauce. Makes approximately 2 ½ quarts sauce for the enchiladas with some sauce on the side.


For the Corn Tortillas

In a medium-sized mixing bowl, combine the corn flour, salt, and water and mix together until you have formed a dough. You can do this with a spoon, but I always use my hands. After the ingredients are completely mixed, use your hands to form balls just smaller than a golf ball and set aside. Preheat your seasoned cast iron skillet so that it is very hot.

In a tortilla press, place one ball in the center of the tortilla press and press together to make one corn tortilla. I use a plastic bag that I cut in half leaving a seam on one side so that I can place the corn masa ball inside the plastic so that it doesn’t stick to the tortilla press. Remove the tortilla from the plastic place it on the cast iron skillet and cook the first side of the tortilla for 30 to 45 seconds, then turn it over and cook for approximately 30 to 40 seconds and cook until it puffs and that is the sign that the tortilla is done.

Place the cooked tortilla in a kitchen towel inside a basket or bowl and prepare the next tortilla following the same steps. Stack the tortillas on top of each other to keep them warm inside the towel. Makes approximately 21 tortillas.
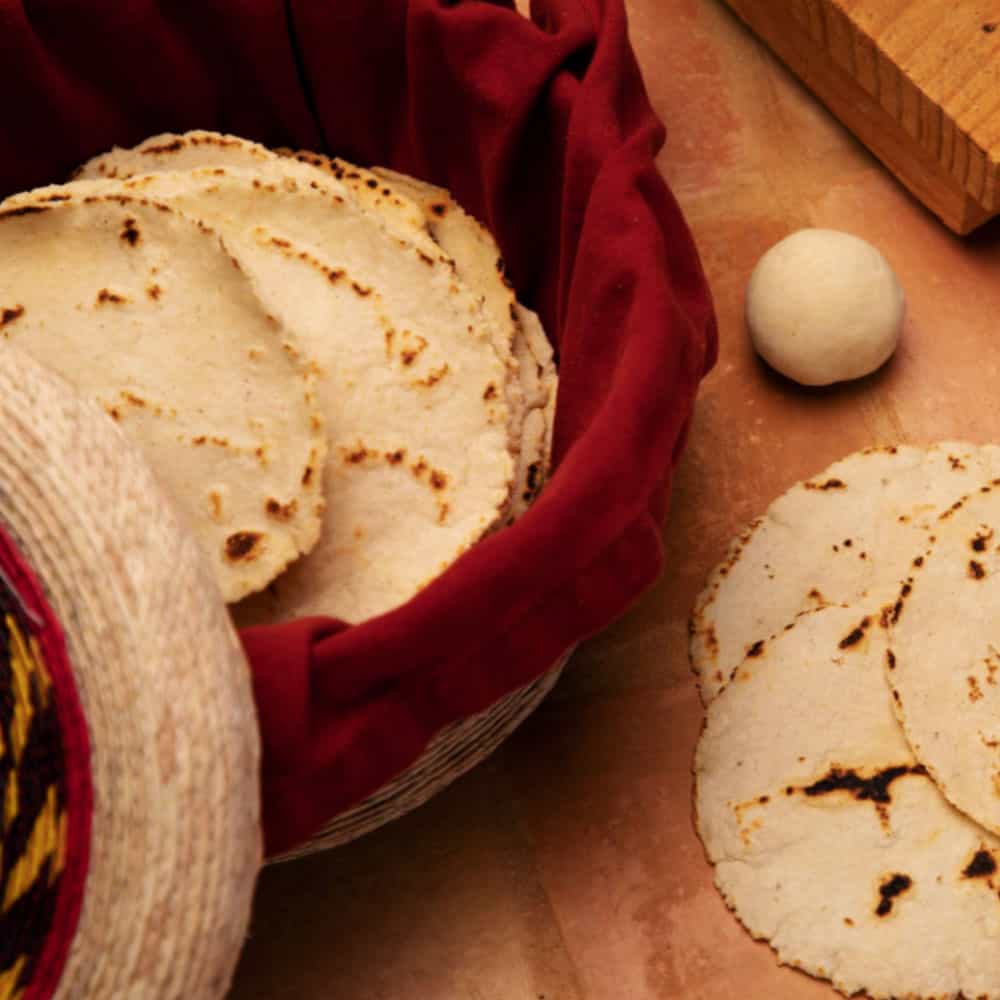
Homemade Tortillas in a bowl

Bake

Preheat your oven to 350 degrees. In a casserole pan or half-hotel pan, layer some green chile sauce to cover the bottom of the pan. Place tortillas on top of sauce (approximately 7 tortillas). Spoon more of the green chile sauce on top of the corn tortillas. Evenly place 1/3 the amount of shredded cooked chicken on top of the green chile sauce and then top with 1 ½ cups of the shredded jack cheese.

Begin another layer. First the corn tortillas (approximately 7 tortillas). Spoon some green chile sauce on top of the tortillas. Evenly place the second 1/3 of the shredded cooked chicken on top of the sauce. Top with another 1 ½ cups of the shredded jack cheese.

Begin the final layer. Place the corn tortillas on top to start the next layer (approximately 7 tortillas). Spoon some green chile sauce on top of the tortillas. Evenly place the final 1/3 of the shredded cooked chicken on top of the sauce. Top with the final amount 1 ¾ cups of shredded jack cheese. Place in the pre-heated oven and bake until the cheese browns and you see bubbles on the side of the pan approximately 30 minutes. Serve immediately.

Notes

The bones can be made into chicken stock. Here is a recipe for homemade rotisserie chicken stock.
Did you make this recipe?

Tag @highdeserttable on Instagram so we can cheer you on! 🌟

Nutrition values are estimates only. See the disclaimer here.

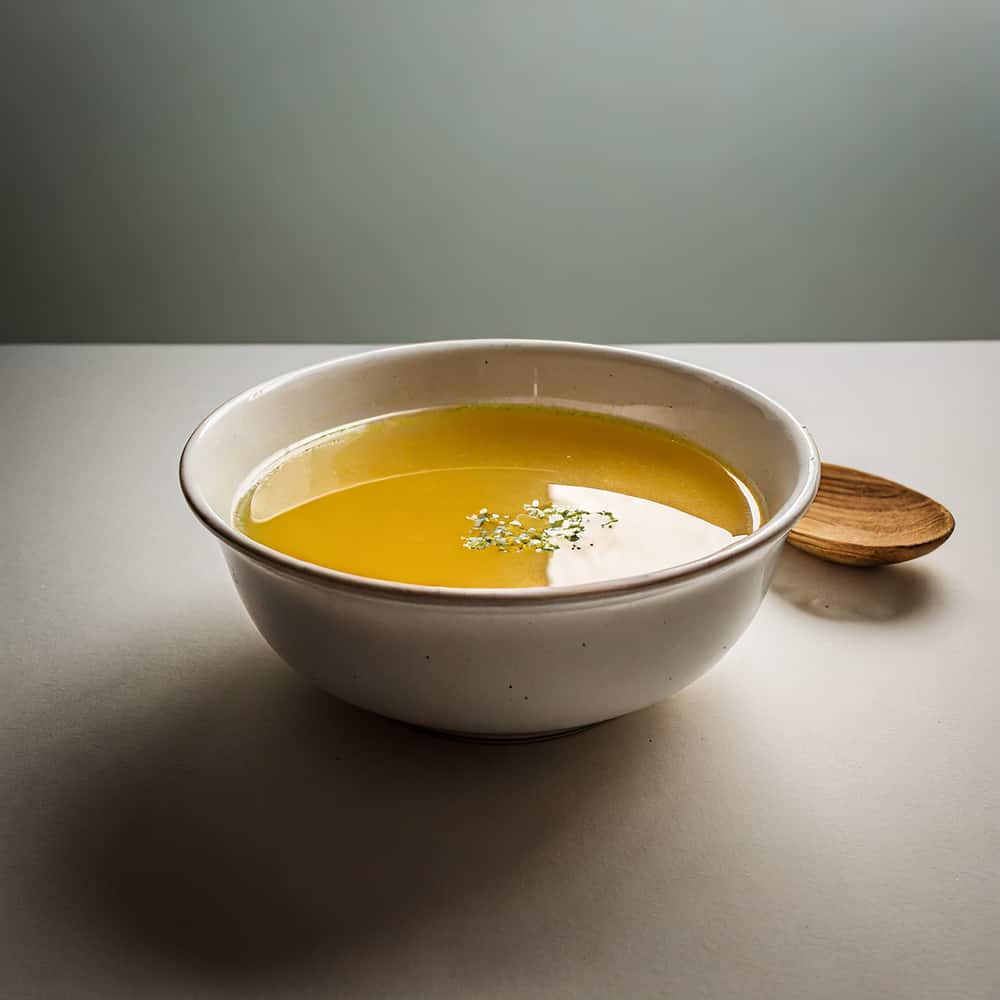
This Rotisserie Chicken Stock - in a bowl

Rotisserie Chicken Stock

Create a rich and flavorful chicken stock by simmering a leftover Rotisserie chicken with aromatic vegetables, such as onions, carrots, and celery. This Rotisserie Chicken Stock is a savory and versatile base for soups, stews, and sauces.

Get the Recipe

Slow Cooker Beef & Chile Stew

Marianne Sundquist · November 17, 2023 · Leave a Comment

The last few weeks I’ve been feeling the pace of life speed up. Between school, work, and shorter days, I knew it was time to pull out my crock pot and make a big pot of something warm that would feed us throughout the week. This Slow Cooker Beef & Chile Stew is a nourishing, hearty, and deeply flavorful recipe that brought a hefty dose of warmth and ease to our meal times lately.

Save some for a snow day

Whenever I make a big pot of something, I usually try to squirrel away a quart in the freezer to share or for a rainy day. I put two quarts in the freezer this time, and we ate the rest for multiple breakfasts and dinners. This stew is particularly good for breakfast with an egg on top and a warm tortilla on the side. If you don’t have a slow cooker, keep reading! You can easily make this in a Dutch oven by braising it at 300 F. for three-ish hours.

Choosing a cut of meat

You’ll notice the recipe calls for beef stew meat, which is easy to find in most grocery stores. In general, the best stew meat is cuts with collagen-rich connective tissues that slowly melt and tenderize in a low heat and slow cooking environment. Chuck, Round, Sirloin, and Brisket are perfect candidates for this type of stew-making, while more tender cuts are best enjoyed by searing, grilling, or roasting. Also, it’s important to remember that other meats like lamb, bison, elk, and pork can also be used interchangeably.

As with many recipes that turn out to be family favorites, I started with what I had. I had butternut squash, onion, a head of cauliflower, a tub of mild red chile and chopped green chile in the freezer, bacon, and an open bottle of red wine. I then picked up mushrooms, beef, and broth, heading home with everything I needed to put this one-pot meal together in the slow cooker.

Flexible veggies

As you look at the ingredients, remember that you can swap out other vegetables, if, for example, you don’t love mushrooms. Potato, pea, pearl onion, cabbage, parsnip, turnip, celery root, and carrot are just some of the vegetables that could be substituted for the ones used here. And if you want to add greens I would recommend adding them towards the end of the cooking process.

Print

Slow Cooker Beef & Chile Stew

Slow Cooker Beef and Chile Stew - in a bowl with spoon
Print Recipe
Pin Recipe

5 Stars 4 Stars 3 Stars 2 Stars 1 Star

No reviews

Indulge in the warmth and ease of this Slow Cooker Beef & Chile Stew, a hearty one-pot meal perfect for busy weeknights. Packed with nourishing ingredients, including beef stew meat and a medley of vegetables, this recipe delivers deep, flavorful satisfaction. Discover the joy of batch cooking as you freeze portions for later or savor it with an egg on top for a comforting breakfast. Learn how to customize the stew with various vegetables and explore the versatility of cuts like Chuck, Round, Sirloin, and Brisket.

  • Author: Marianne Sundquist
  • Prep Time: 1 hour
  • Cook Time: 5 hours
  • Total Time: 6 hours
  • Yield: 5 quarts
  • Category: stew
  • Method: braise
  • Cuisine: New Mexican

Ingredients

Units
  • 3 slices, applewood smoked bacon, sliced
  • 2 1/2 lb. beef stew meat, trimmed of excess fat
  • 2 T. Masa Harina
  • 2 T. olive oil
  • 1 large red onion, diced
  • 8 oz. crimini mushrooms, quartered
  • 6 cloves of garlic, thinly sliced
  • 2 T. High Desert Herbs or Herbes de Provence
  • 1 c. red wine
  • 2 c. (1 pint) New Mexico red chile puree
  • 2 c. (1 pint) New Mexico chopped green chile
  • 1 medium head cauliflower, all tender stems and florets cut into 1” pieces
  • 1 medium butternut squash, peeled, seeded & cut into 1” pieces
  • 6 c. chicken broth
  • Salt and pepper to taste

Instructions

The step with the bacon

In a large heavy-bottomed pot over low heat, slowly cook the bacon until the fat is rendered and the bacon crispy. Remove the bacon with a slotted spoon and add it to the slow cooker crock.

Sear the meat

Turn the heat up to medium-high. Gently toss the trimmed beef with the masa harina, salt and pepper. Sear the meat on all sides until caramelized, working in batches if needed so as not to overcrowd the pan and meat in the slow cooker crock with the bacon.

Prep the rest

Add olive oil to the pot. Add the onion and mushrooms. Cook for around five minutes, stirring occasionally. Add the garlic and dried herbs. Cook for a minute, being careful not to burn the garlic. Add the red wine and let simmer for a few minutes, scraping any bits of goodness from the bottom of the pot with a wooden spoon. Carefully transfer this mixture to the slow cooker crock. Place the crock into the slow cooker base.

Cook it slow

Add the red chile puree, chopped green chile, cauliflower, butternut squash, and chicken broth. Let cook in the slow cooker for 5 hours.

Did you make this recipe?

Tag @highdeserttable on Instagram so we can cheer you on! 🌟

Nutrition values are estimates only. See the disclaimer here.

Red Chile Mezcal BBQ Pulled Pork

Marianne Sundquist · June 2, 2023 · Leave a Comment

For years my go-to way of preparing pulled pork revolved around the idea of submerging caramelized meat in the oven with broth and aromatics (like onion, garlic, cilantro stems, and a jalapeno) over low heat for many hours, sometimes even overnight in the crock pot. I have always loved braising because eventually all of the toughness disappears, not only creating strands of tender meat but just as much because of the luscious broth that’s left behind that can be used for reheating meat, soup, stew or to freeze for a rainy day. 

Why roast it?

This recipe approaches pork shoulder in another effective way—through roasting. And even though we forfeit a few quarts of liquid gold that come from braising, we end up with melt-in-your-mouth shreds of tender meat and crispy pork skin speckled throughout, perfect for drizzling, dunking or tossing in Red Chile High Desert BBQ Sauce, a chile based sauce spiked with a generous pour of mezcal and softened with a hunk of butter. 

The butt is the shoulder

This recipe calls for Pork Shoulder (also called Picnic Shoulder or Picnic Roast), but Pork Butt (also called Boston Butt) is technically part of the front shoulder and some might even argue is a better choice so let’s talk about it: Pork Butt is not from the rear of the pig at all, but a primal cut right behind the pig head. Late in the 19th century the topsy-turvy name was coined and stuck. The shoulder on the other hand, sits right below the butt and travels down the front leg toward the hoof. Pork Butt has more fat marbling throughout the meat, which renders during cooking adding more moisture and flavor. Pork shoulder has less fat throughout the meat, but often a thicker piece of fat on top, which crisps up beautifully during the final minutes of cooking. So either way you can’t lose. 

Prep the day before

I like to make pulled pork and BBQ sauce the day before a backyard barbecue, so when I wake up the next morning all I have to do is sip on coffee and think about how all the big lifting for the day is done. The grill is also wide open, with plenty of room for grilling buttered buns, vegetables, and fruit. Aside from making delicious sandwiches, this combo of roasted pork and bbq sauce can be put to use in many ways. You could fill tortillas for tacos, sprinkle on salads, serve with rice or quinoa, eggs, etc. The Bbq Sauce stands on its own, pairing well with shrimp, white fish, veggies, chicken, or drizzled on burgers and brats.

Print

Red Chile Mezcal BBQ Pulled Pork

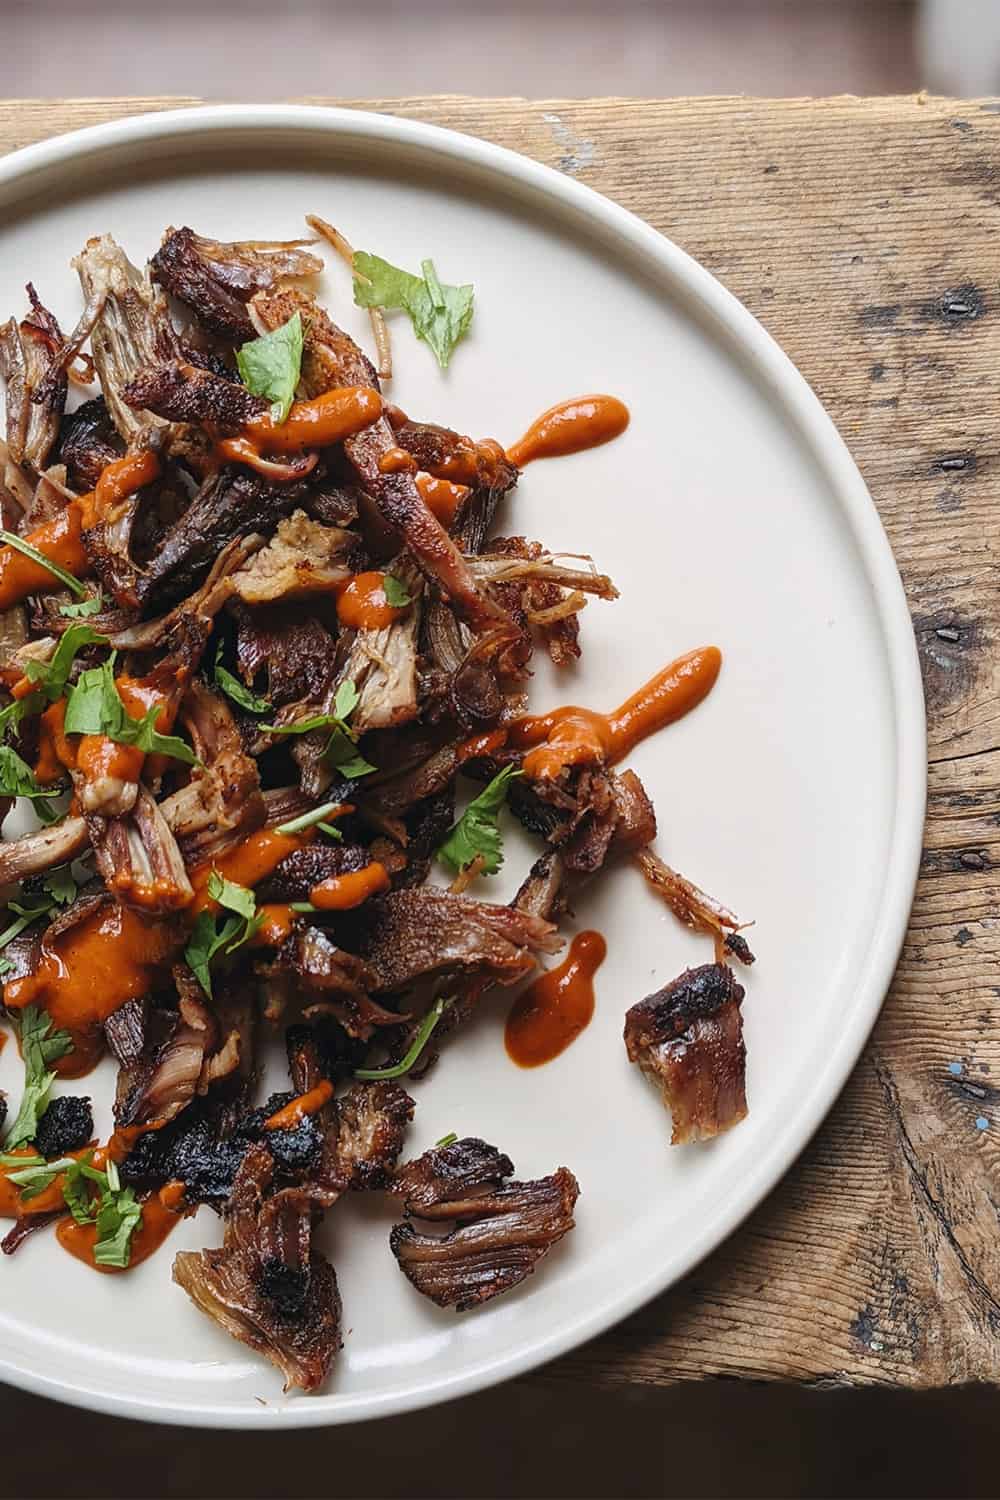
HDT BBQ Pulled Pork roasted sauced and ready to eat
Print Recipe
Pin Recipe

5 Stars 4 Stars 3 Stars 2 Stars 1 Star

No reviews

This bbq pulled pork turns your classic american backyard barbecue into a Southwest-themed party by kicking up the flavors with red chile and mezcal. This slow-cooked meat is perfect on toasted buns, tortillas, crispy taco shells, or on your favorite southwest salad.

  • Author: Marianne Sundquist
  • Prep Time: 1 hour
  • Cook Time: 4 hours
  • Total Time: 5 hours
  • Yield: 10-12 servings
  • Category: BBQ
  • Method: Roast
  • Cuisine: American

Ingredients

Units

for the pork:

  • 3 t. whole coriander seed
  • 1 t. black peppercorns
  • 1 t. dried juniper berries
  • 2 T. packed brown sugar
  • 1 T. red chile powder, whatever heat you prefer
  • 1 T. high desert herbs or herbes de provence
  • 2 t. kosher salt
  • 2 t. garlic powder
  • 1 t. dried culinary lavender
  • 4 lb. boneless pork shoulder

for the high desert bbq sauce:

  • 4 T. butter
  • 1 c. diced onion
  • 4 garlic cloves, sliced
  • 1/2 c. mezcal
  • 2 c. (1 pt.) mild Red chile puree
  • 2 t. Dijon mustard
  • 1/4 c. apple cider vinegar
  • 1/4 c. brown sugar
  • 2 t. worcestershire sauce
  • 1/2 t. black pepper
  • 1 1/2 t. kosher salt

Instructions

Making the spice rub

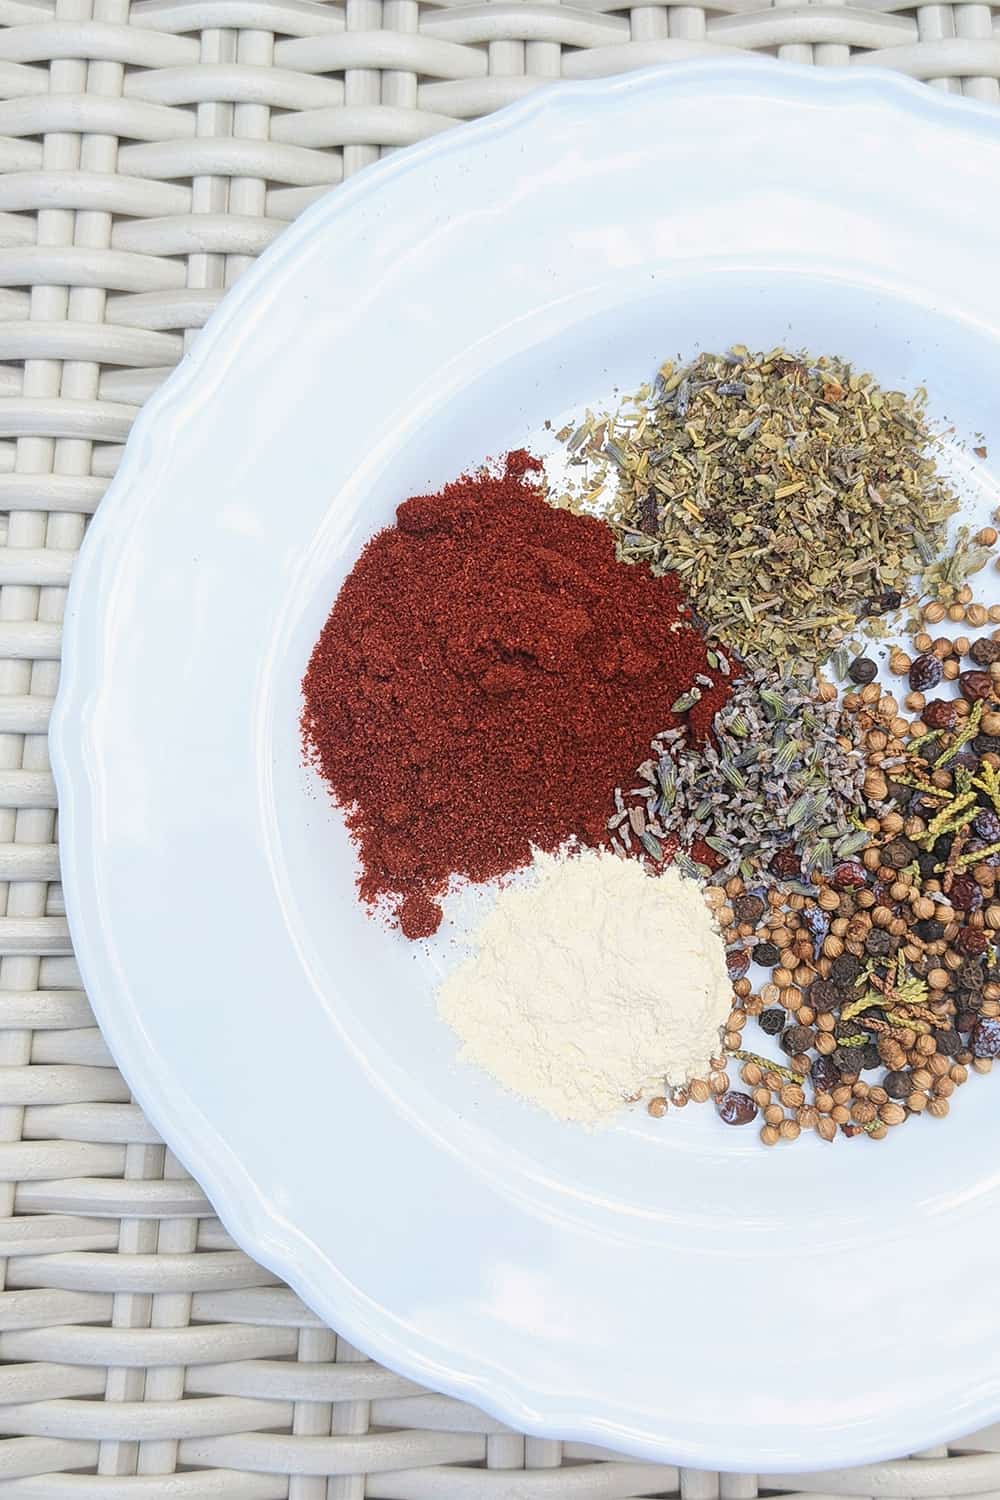
The night before, make the spice rub: In a small pan over medium heat, toast the coriander, peppercorns, and juniper berries until they are lightly toasted and you start to smell their fragrance wafts out from the pan. Transfer this to a very dry blender, along with the brown sugar, red chile powder, herbs, salt, garlic powder, and lavender. Blend until pulverized into a fine powder. Lightly score any thick areas of fat with a sharp knife. Using all the spice rub, massage the pork all over with the spice rub and refrigerate overnight in an ovenproof baking dish.

ingredients prepped on a plate including peppercorn, red chile powder, and more

Making the BBQ sauce

To make the bbq sauce: In a saucepan over medium heat melt the butter. Add the onion and garlic and let simmer until the onions turn translucent, around 10-15 minutes. Add the mezcal and let simmer for another 15 minutes. Add the chile puree, apple cider vinegar, dijon, brown sugar, Worcestershire, black pepper, and salt. Let this mixture simmer for another 15 minutes, stirring occasionally. Carefully transfer the sauce to a blender and puree until smooth.

Roasting the pork shoulder

The next day when you’re ready to roast the pork shoulder, pull the pork from the refrigerator and let it sit at room temperature for a half hour. Preheat the oven to 275 F. Roast pork in the oven, uncovered for around 3-4 hours, or until the internal temperature reads 190 F. on a thermometer. Turn the heat up to 500 F. and roast for an additional 10-15 minutes, until the skin is a deep golden brown and crispy. Remove the pork from the oven and let it rest for 30 minutes.

HDT BBQ Pulled Pork roasted sauced and ready to eat

Pull apart the meat and crispy skin into strips and serve warm with bbq sauce on the side.

Did you make this recipe?

Tag @highdeserttable on Instagram so we can cheer you on! 🌟

Nutrition values are estimates only. See the disclaimer here.

Hatch Green Chile Picnic Chicken Salad

Marianne Sundquist · May 26, 2023 · Leave a Comment

When warm weather arrives, my family can’t wait to get outside. We take more walks, go adventuring around town and look for any and all excuses to light up the grill. This Picnic Chicken Salad is made for days like these. It’s easy to make ahead, easy to make into sandwiches, and versatile enough to bring along on a hike or stash in your picnic basket for tailgating at the opera.

Make it happen

This recipe brings back a lot of memories because it reminded me this week of a lobster salad I used to make way back when I was working as a chef de partie at Avenues in the Peninsula Hotel in Chicago under the helm of Chef Graham Elliot. The kitchen was small and only had room for four of us aside from Chef. Even though we were serving anywhere from three to 20+ course spontaneous tasting menus, somehow night after night we got it done with enough juice left in the tank to wake up and do it again the next day. I think having a handful of so-simple-how-can-it-taste-this-amazing kind of recipes up our sleeves was how we pulled it off with such a small team. That, and the phrase that became a kind of daily mantra “make it happen” which when said to each other was annoying and motivational in equal measure. And somehow at the end of the night, even when we were faced with a seemingly impossible prep list or a stack of tickets from the dining room, by some miracle we actually had made it happen. I would like to publicly apologize to my husband and kids who sometimes hear me accidentally say “make it happen” to them. What can I say? It’s a habit that has worked for me for a long time, so now as a mom maybe it can work its magic at home too, or so I can dream.

Creme Fraiche is the way

You’ll notice that I steer clear of mayo or even sour cream and use creme fraiche instead. Creme Fraiche is the French, fattier and creamier cousin to sour cream. Thinned with a little lemon we get a decadent, bright, and creamy dressing that doesn’t get weighed down with the oily mouthfeel found in mayo. Don’t get me wrong, I love a good garlic mayo on too many things to count, but here I wanted to keep it light and flavor-forward in every possible way.

The meat

You can make this salad as it is here with pulled roasted chicken, or you can use steamed or roasted chicken breasts, roasted or smoked salmon, shrimp, or cooked lobster meat. If you want to leave out meat altogether, just substitute roasted baby or new potatoes, and viola! One of my favorite potato salads of all time. 

Common misconceptions

There is a common misconception that when picnic salads go bad, it is because of the creamy dressing. This is false. A lot of times, a dressing will actually protect the salad a bit because they usually contain some preservatives like sugar or acid, but the bigger dangers are dirty hands or utensils when preparing it and all cut vegetables and fruits because they contain more surface area for bacteria to grow. When you head out into the field with any kind of prepared food, keep it on ice in a cooler or be sure to consume it within 2 hours, or 1 hour if it’s extra hot out. Happy trails!

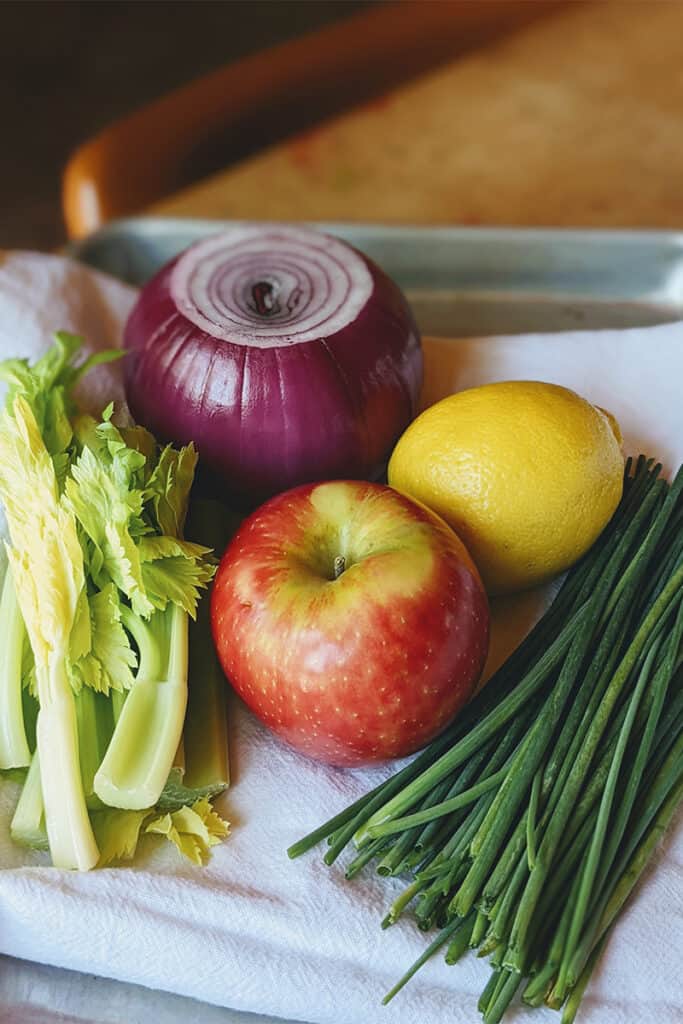
Picnic chicken salad ingredients fresh from the market
Print

Hatch Green Chile Picnic Chicken Salad

Print Recipe
Pin Recipe

5 Stars 4 Stars 3 Stars 2 Stars 1 Star

No reviews

This Picnic Chicken Salad is made for warm-weather picnics or backyard barbeques. It’s easy to make ahead, easy to make into sandwiches, and versatile enough to bring along on a hike or stash in your picnic basket for tailgating.

  • Author: Marianne Sundquist
  • Prep Time: 15 mins
  • Cook Time: 0 mins
  • Total Time: 15 minutes
  • Yield: 2 quarts
  • Category: Summer
  • Method: chop
  • Cuisine: American

Ingredients

Units
  • 2 fire-roasted hatch green chiles, peeled, seeded, and diced
  • 8 oz. creme fraiche
  • 1 Lemon, juiced and zested (around 2 T. Juice)
  • 1 large apple, finely diced
  • 1/2 c. finely diced red onion
  • 1/4 c. Minced chives
  • 1 c. Celery and leaves
  • 4 c. pulled roasted Chicken,
  • Salt and pepper to taste

Instructions

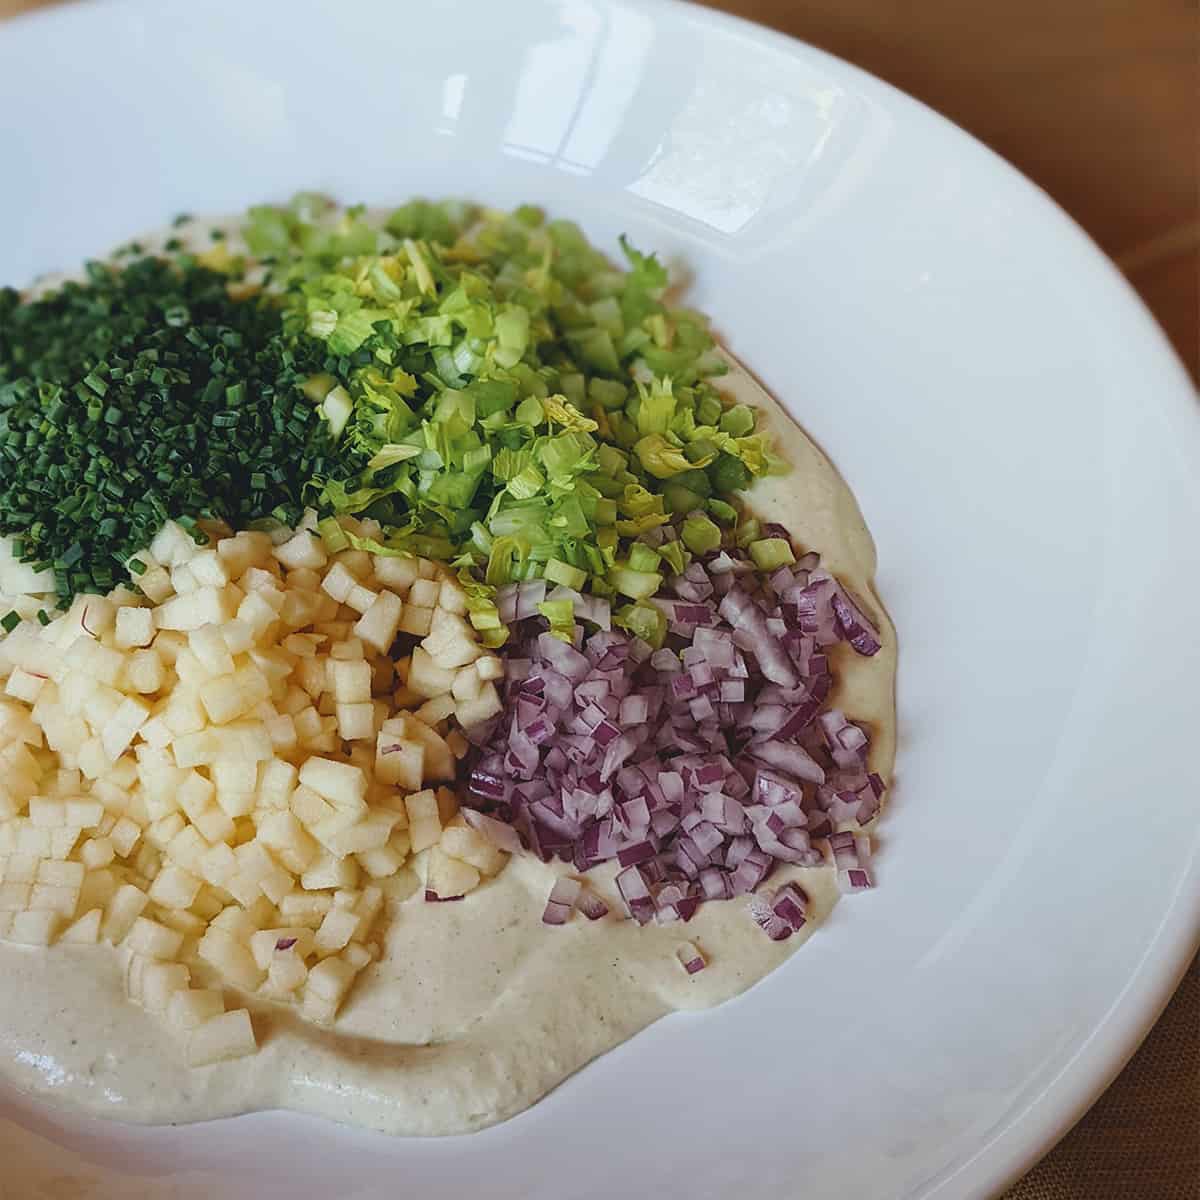
In a blender, blend the green chiles, creme fraiche, lemon juice, and zest until smooth. Transfer this mixture to a large bowl and add the apple, red onion, chives, celery leaves, and roasted chicken. Season to taste with salt and pepper.

Picninc chicken salad ingredients chopped, prepped, and ready to go

Did you make this recipe?

Tag @highdeserttable on Instagram so we can cheer you on! 🌟

Nutrition values are estimates only. See the disclaimer here.

Calabacitas Benedict

Marianne Sundquist · May 22, 2023 · Leave a Comment

Calabacitas “little squash”, is a dish with many names, and variations and steeped in New Mexico history originating from Native American Pueblos dating back to the 16th century. As with most foods unique to this area, the finished dish is only the starting point for the many opportunities to learn about the foods, people, and history that make up the heart and soul of the Southwest landscape. Each new ingredient and method I learn here change me, even in a small way. Added together, I can’t help but notice that living and cooking here has changed and grounded me in ways I could have ever imagined where the only thing I know for sure, is that I hope I will be learning here with an open heart for the rest of my life. Cooking becomes less about what I do in the kitchen and more about what others have experienced, preserved, and the gift of gathering around the kitchen table to share a dish like this. 

Sacred Ingredients

In her James Beard Award-winning book, Foods of the Southwest Indian Nation, Lois Ellen Frank (Kiowa on her mother’s side and Sephardic on her father’s side) writes about the sacred elements to tribes across the country and the ingenuity of an ecosystem that is created by planting three crops that benefit and thrive when they are planted together in companion planting. This book also happens to include the largest acknowledgments section of any book I have ever seen. I don’t think this is by accident, and if I’ve learned anything at all since my time here learning from chefs like Lois and Walter Whitewater from Red Mesa Cuisine, it’s that the native approach to cooking embodies a spirit of attention and care for all living things including land and food, with a deep appreciation for teachers in all forms.  

Of the three sisters, Lois writes that they “are believed to have been domesticated in Mesoamerica sometime between 7000 and 3000 B.C.” Then, as travel increased along the El Camino Real de Tierra Adentro, the 1591-mile-long road between Mexico City and San Juan Pueblo, New Mexico, it is believed corn and chile was added to cooked summer squash making the combination we know and love today. In Lois’s book the recipe, also called calabacitas, is called Mesa Squash Fry and includes red bell pepper and sunflower seeds. In the Pueblo Indian Cookbook, compiled and edited by Phyllis Hughes a similar version is called Skillet Squash and includes the addition of shredded longhorn cheese (cheddar or american style cheese in the shape of a half moon), while Fabiola C. Gilbert in her book Historic Cookery published in 1931 refers to Calabacitas con Chile Verde which includes a small amount of milk and grated Native or American cheese. I have seen more variations than I can count with additions like tomatoes, chicken broth, cream, queso fresco, jalapeno, and differences in texture from extra brothy to this version which is more on the caramelized vegetable side.

Making the Calabacitas

Calabacitas is wonderful in a bowl on its own, but it also happens to make my favorite benedict of all time. This is a vegetarian recipe, but you could always add a slice of ham or bacon on top of the bread if you wish. Or, if you didn’t want to use biscuits or english muffins, you could always swap those out for roasted fingerling potatoes, sweet potatoes, roasted asparagus or a bed of sauteed hearty greens like kale, chard or collards. 

The classic way of preparing hollandaise sauce is by using a double boiler and saying lots of prayers while whisking. This blender version can be made with a standard blender or an immersion blender and is so easy you might be inclined to add this to your regular brunch rotation.

Print

Calabacitas Benedict

HDT Calabacitas Benedict plated
Print Recipe
Pin Recipe

5 Stars 4 Stars 3 Stars 2 Stars 1 Star

No reviews

Calabacitas is wonderful in a bowl on its own, but it also happens to make my favorite southwestern style benedict of all time. This is a vegetarian recipe, but you could always add a slice of ham or bacon on top of the bread if you wish.

  • Author: Marianne Sundquist
  • Prep Time: 30 mins
  • Cook Time: 30 mins
  • Total Time: 1 hour
  • Yield: 6 servings
  • Category: Breakfast
  • Method: fire-roasted
  • Cuisine: New Mexican

Ingredients

Units

for the calabacitas:

  • 2 T. olive oil
  • 1 red onion, diced
  • 3–4 cloves of garlic, finely chopped
  • 2 fire roasted poblano peppers, peeled, seeded and diced
  • 2 medium zucchini, diced
  • 2 medium yellow squash
  • 2 c. fire roasted corn kernels
  • 1 T. fresh oregano, rough chopped (or 2 t. dry)
  • salt and pepper, to taste

for the hollandaise:

  • 2 1/2 sticks unsalted butter
  • 2 large egg yolks
  • 2 T. freshly squeezed lemon juice
  • 1/2 t. New Mexico Red Chile Powder or to taste
  • Salt and pepper, to taste
  • warm water, as needed for thinning

for serving:

  • 6–12 eggs, prepared however you like them best
  • 6 english muffins or biscuits, sliced in half, toasted and buttered
  • 1/4 c. minced chives, for garnish


Instructions

To make the calabacitas, heat the olive oil in a large, heavy-bottomed pan over medium-high heat. Add the onion and cook until they are beginning to caramelize. Add the garlic and cook for another couple of minutes. Now add the fire-roasted poblanos, zucchini, yellow squash, corn and oregano. Let this cook, stirring occasionally until the vegetables are tender, all of the water has evaporated from the zucchini and yellow squash and everything in the pan is starting to caramelize. Season with salt and pepper until it tastes wonderful to you. Keep warm.

Less than 30 minutes before serving the benedict is the time to make the hollandaise. Fill your blender with very warm water. In a small saucepan over medium heat bring the butter to a simmer and turn off the heat. Pour out the water from the blender, saving it for another use like watering plants once it comes to room temperature and dry the blender with a clean cloth. Transfer the butter to a heat-proof pitcher or measuring cup with a pouring spout to have ready to go. Add the egg yolks, lemon juice, New Mexico chile powder and a pinch of salt and pepper to the blender. Blend this on a medium speed and while it’s blending, carefully remove the fill cap from the blender lid and very slowly pour in the hot butter. Watch the mixture as you pour, you should see it thicken as it emulsifies. Once all the butter has been added, season with salt and pepper as needed. If the hollandaise is too thick, you can thin it out by blending in more lemon juice if you feel it’s needed or one tablespoon of warm water at a time. Transfer the sauce to a heat proof container and keep covered and warm until ready to serve.

To assemble the benedict:  Place English muffins or biscuits in a large bowl, top generously with a spoon of calabacitas, an egg and a drizzle of hollandaise sauce. Garnish with chives and serve immediately.

Did you make this recipe?

Tag @highdeserttable on Instagram so we can cheer you on! 🌟

Nutrition values are estimates only. See the disclaimer here.

  • « Go to Previous Page
  • Page 1
  • Page 2
  • Page 3
  • Go to Next Page »

High Desert Table

Copyright © 2025 · High Desert Table

  • Privacy Policy
  • Nutrition Disclaimer