• Skip to primary navigation
  • Skip to main content
High Desert Table

High Desert Table

Your everyday guide to Southwestern cooking

  • Home
  • Recipes
  • About
  • Shop
  • Private Events
  • Contact
  • Show Search
Hide Search

chile

Mad Jack’s Slow Roasted Pork Shoulder: Oven-Baked BBQ Perfection

Marianne Sundquist · December 21, 2024 · Leave a Comment

Introduction: A Taste of Mad Jack’s at Home

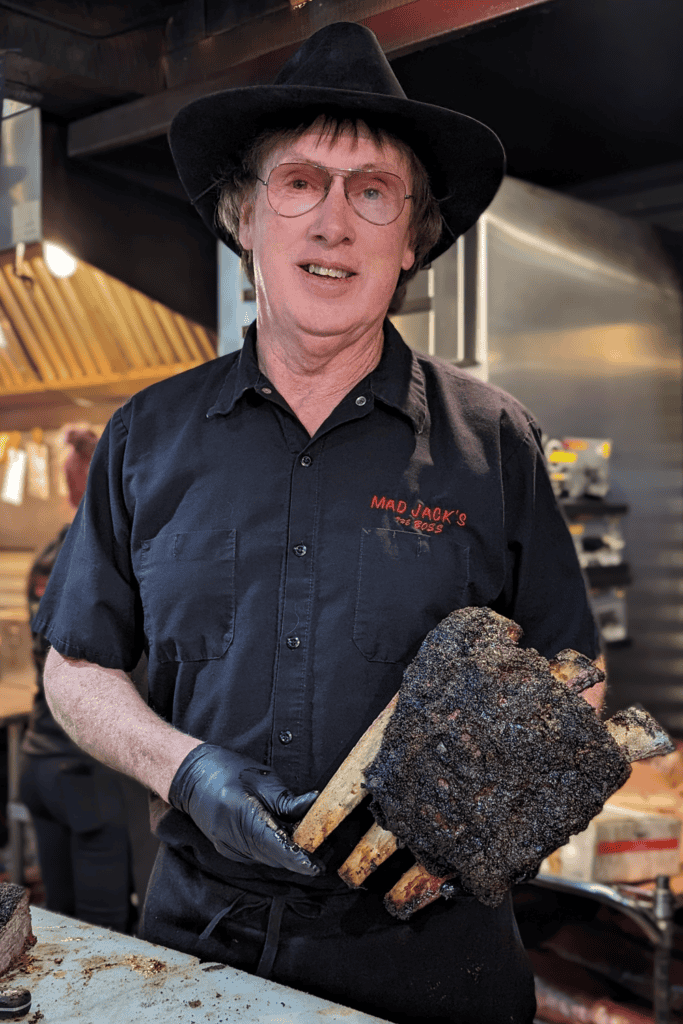
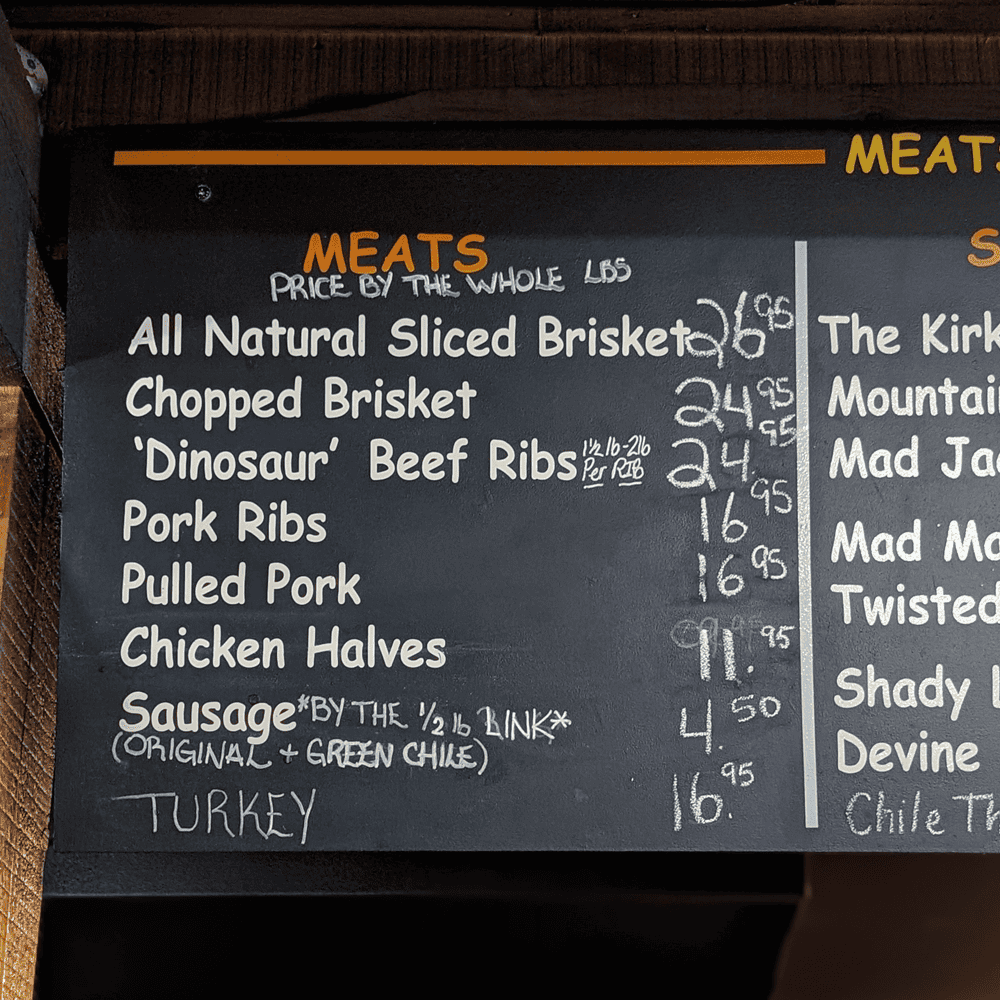
Last spring I had the chance to visit Mad Jack’s Mountaintop BBQ in Cloudcroft for a story I was writing for New Mexico Magazine’s July issue. James Jackson, owner and pitmaster of Mad Jacks, has a loyal and passionate following for his hospitality and kindness just as much as his exceptional barbeque. His wood fired smokers run throughout the night and in the morning brisket, sausages, pork shoulder, chicken and turkey legs are pulled from barrels just in time for them to rest before Jackson opens the door and starts slicing meats to order with his crew.

Slow Roasted Pork Shoulder - Pitmaster James Jackson

For the article Jackson helped me think through how home cooks could approach pork shoulder using their oven instead of a smoker. Now, I’m not going to say that this rivals the incredible flavor and tenderness that comes after slowly cooking meat in a smoker fired with post oak he brings in from Texas. For that, I suggest a road trip down south to Cloudcroft. But a good rub and eight hours in a low oven will get you pretty far.

Slow Roasted Pork Shoulder - Mad Jack's menu board

The Secret’s in the Rub: A New Mexico Twist

This is an adaptation of Jackson’s rub which has a distinct sweet and spicy punch with notes of celery seed lingering throughout. Here, I swap out most of the celery seed for High Desert Herbs (a blend of marjoram, lavender, rosemary, thyme, New Mexico red chile flakes and sage) and swap out cayenne pepper for New Mexico Chile Powder. You might find that you have some rub left over. Just make sure to have very clean and dry hands when handling the rub mixture and you can save it for seasoning all kinds of meat and vegetables.

How to serve this slow roasted pork shoulder?

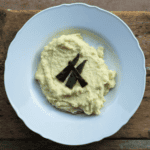
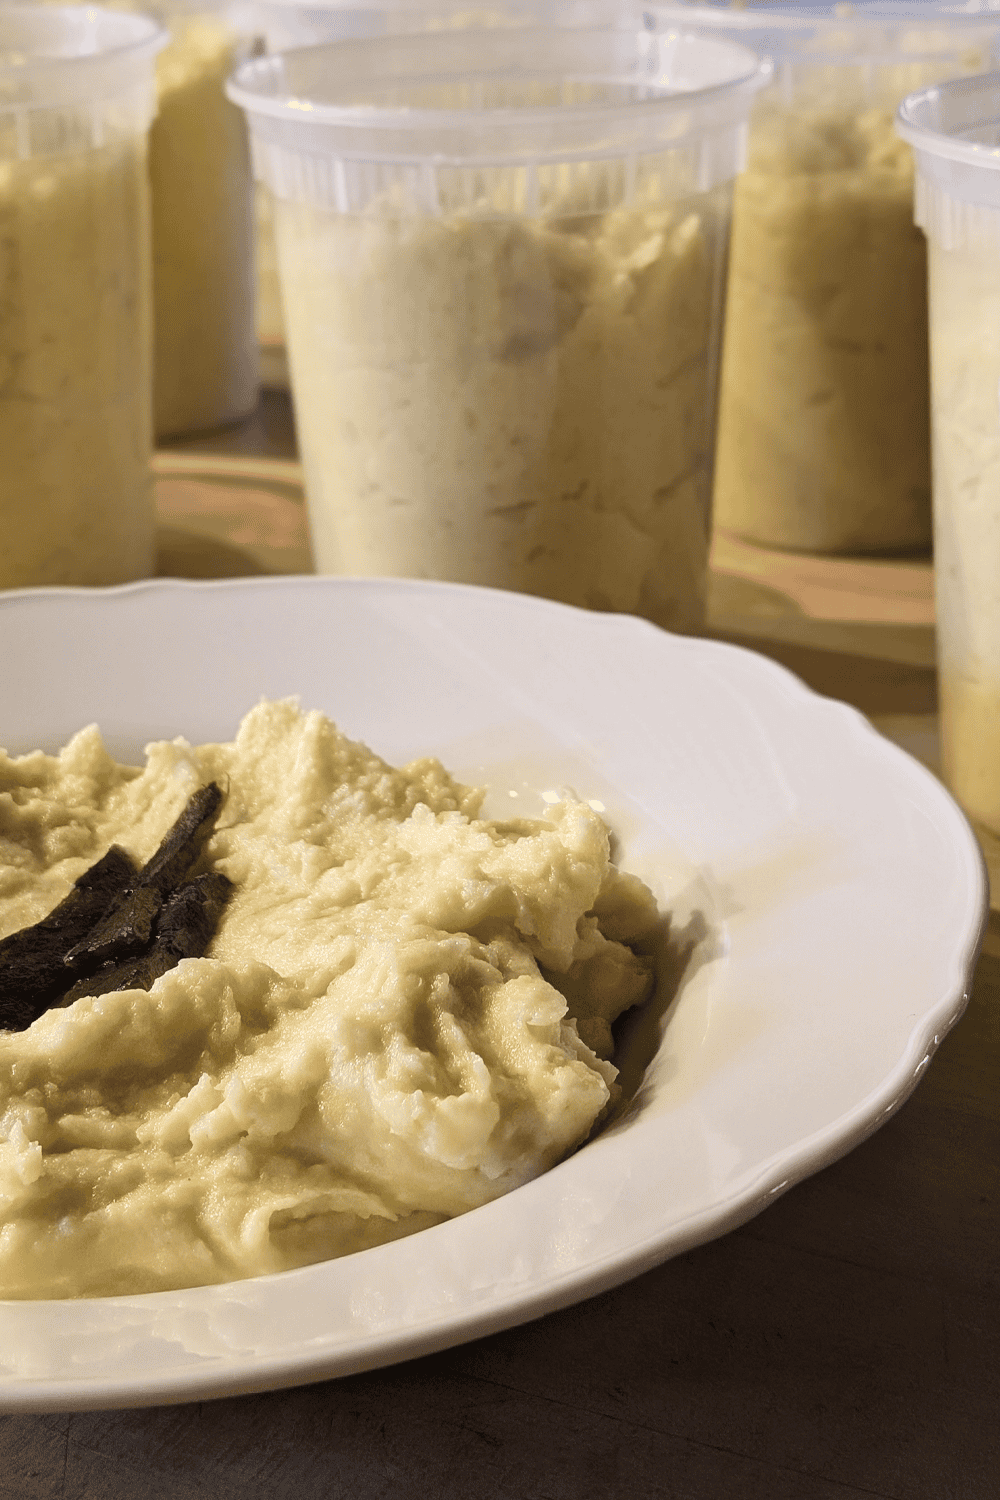
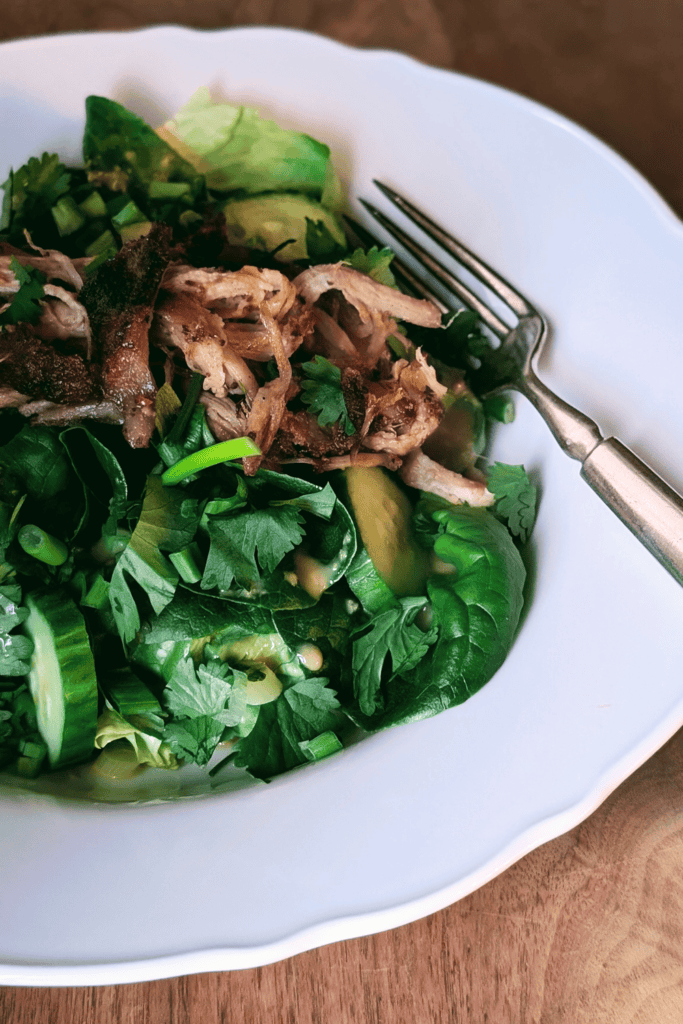
On the day I made this, I also made a lime, sesame and ginger vinaigrette and made a big salad with Ground Stone Farms greens, cucumbers, cilantro, scallions and warm pork shoulder over the top. My husband Hans had salad on the side because he had a different idea. He piled the pulled pork shoulder into tortillas and got the BBQ sauce out of the fridge. We had different ideas about the best way to eat something that had been making our house smell good all day and both were perfect, so I’ll let you use your best judgement.

Slow Roasted Pork Shoulder - plated with greens
Print

Mad Jack’s Slow Roasted Pork Shoulder: Oven-Baked BBQ Perfection

Slow Roasted Pork Shoulder - out of the oven
Print Recipe
Pin Recipe

5 Stars 4 Stars 3 Stars 2 Stars 1 Star

No reviews

Recreate the flavors of Mad Jack’s Mountaintop BBQ at home with this slow-roasted, oven-baked pork shoulder recipe featuring a unique New Mexico-inspired rub. Perfect for sandwiches, salads, and more!

  • Author: Marianne Sundquist
  • Prep Time: 1 hour
  • Cook Time: 8 hours
  • Total Time: 9 hours
  • Yield: 10-12 servings
  • Category: BBQ, dinner, winter
  • Method: slow roast
  • Cuisine: New Mexican

Ingredients

  • 2 T. packed dark brown sugar
  • 1 T. kosher salt
  • 1 T. New Mexico Red Chile Powder
  • 1 T. High Desert Herbs (or Herbes de Provence)
  • 1 T. coarse black pepper
  • 1 T. dried onion flakes
  • 2 t. garlic powder
  • 2 t. smoked paprika
  • 1 t. celery seed
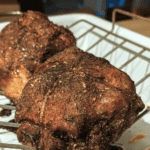
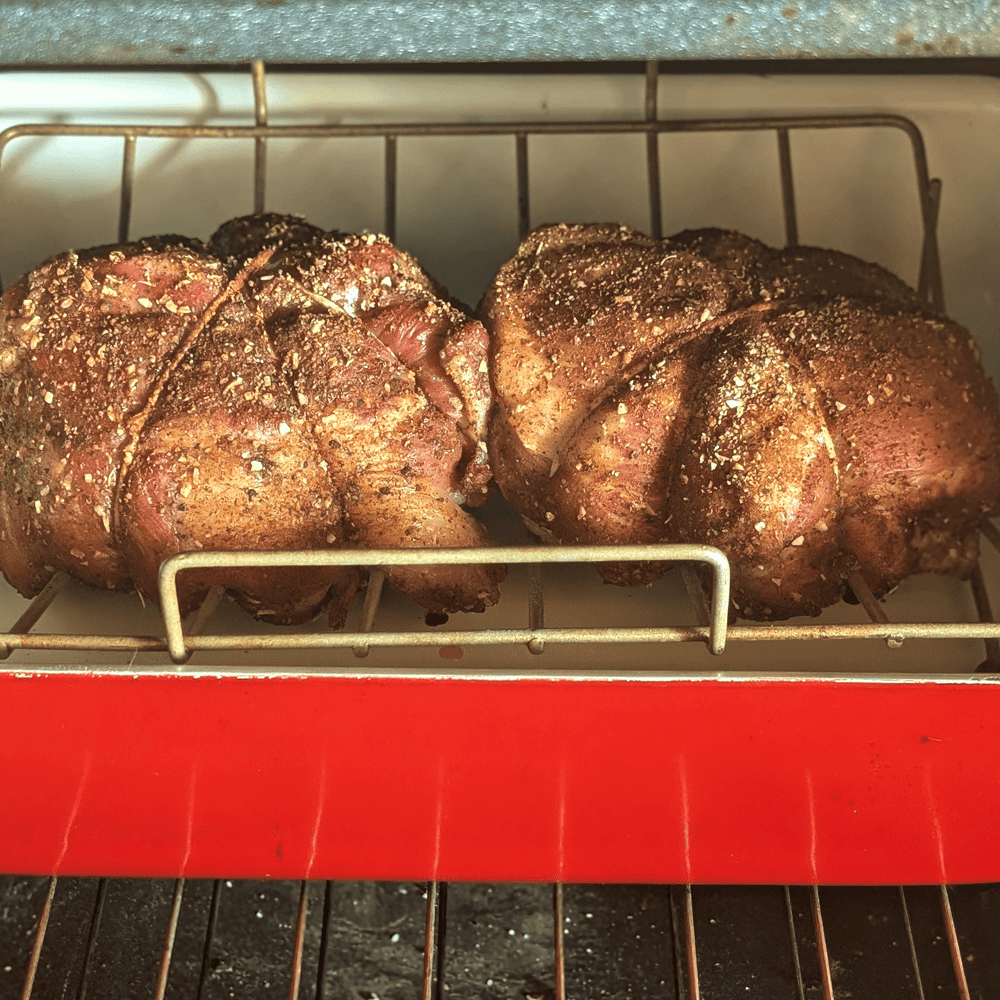
  • 1, 6 pound boneless pork shoulder, trimmed and tied with butcher twine

Instructions

Prepping the rub

In a small bowl, stir together the dark brown sugar, kosher salt, New Mexico Red Chile Powder, High Desert Herbs, coarse black pepper, dried onion flakes, garlic powder, smoked paprika and celery seed.

Slow Roasted Pork Shoulder - prepped in the oven

Slow Roasting Instructions

Rub some of the rub mixture on all sides of the tied pork shoulder and place the meat in a roasting pan with a rack if possible. Roast for around 8 hours, or until it reaches an internal temperature of 195 F. Leave uncovered until it has a nice “bark” developing and then gently cover it with foil so the outside doesn’t burn.

Resting and Shredding the Pork

When the pork is done cooking, let it rest at room temperature until it’s cool enough to safely pull apart into pieces with your hands. As you’re shredding the pork, sprinkle a little bit of the rub into the shredded meat, tasting as you go. You’ll have some extra rub to use at a later time.

Let cool to room temperature before transferring to the fridge for up to five days.

Did you make this recipe?

Tag @highdeserttable on Instagram so we can cheer you on! 🌟

Nutrition values are estimates only. See the disclaimer here.

Hearty Beef, Squash, and Red Chile Soup

Marianne Sundquist · December 4, 2024 · Leave a Comment

I’m not calling this a breakfast soup even though the photo has a fried egg floating on top, but this soup is so versatile, warming, and nourishing it can easily be enjoyed any time of the day. On the day I made this hearty beef and red chile soup it simmered away on the stove all afternoon and we had it for dinner. But the next morning, things got really exciting. Some leftover soup warmed up with an egg on top seemed like the breakfast that made the most sense on a cold morning. And wow, we were right.

A New Mexican Inspiration

So this story really begins because I picked up a new chile ristra and have been looking for a way to utilize some of the brilliantly red dried chiles hanging in my kitchen like a warmth-inducing chandelier. So in making this soup, New Mexico Red Chile is where I began.

The Power of Pantry Staples

Then of course, I looked around to see what needed to be used up in my kitchen. I noticed some zucchini squash in the fridge that I had purchased but then forgot to use. This is the way it goes and I have to admit, I love when these parameters come into play and combinations I may have never thought of simmer to the surface. And that’s what happened here. If I had a completely blank page in front of me I can imagine myself thinking about making a different soup altogether. Maybe I would have added beans or cauliflower or pumpkin. But in that moment, I had zucchini and I’m grateful I did.

A Squash for All Seasons

You’ll notice that I am using the broader name “Squash” in the title of this recipe. It’s important to mention because you can use any variety of squash here. Especially being that we are smack dab in the middle of winter squash season. Whatever squash you want to use, consider how you want to prepare it before adding it to the soup.

For a summer squash like zucchini, it can just be diced and added to the soup. If you use Butternut, you can trim it, peel it with a vegetable peeler, take the seeds out and then dice it for soup. For Kabocha or Delicata squash varieties, you can simply trim off the ends, slice it in half to remove the seeds, then dice it leaving the edible skin on before adding it to the soup. If you wanted to use a pumpkin, you could cut the pumpkin into quarters or wedges (depending on size), roast the pumpkin in the oven with a drizzle of olive oil, salt, and pepper before peeling it and dicing the roasted pumpkin. If you use cooked squash, you can add it towards the end of the cooking process, about 15 minutes before serving.

This soup can be served on its own, or garnished with cilantro or chives. I would recommend some warm bread or tortillas on the side.

Print

Hearty Beef, Squash, and Red Chile Soup

Beef and Red Chile Soup with fried egg
Print Recipe
Pin Recipe

5 Stars 4 Stars 3 Stars 2 Stars 1 Star

No reviews

A versatile and warming soup that can be enjoyed any time of day. This hearty beef, squash, and red chile soup is perfect for using up winter squash and red chiles.

  • Author: Marianne Sundquist
  • Prep Time: 1 hour
  • Cook Time: 2 hours
  • Total Time: 3 hours
  • Yield: 8-10 servings
  • Category: Soup, Fall, Winter, Stew
  • Method: Simmer
  • Cuisine: New Mexican

Ingredients

for the chile sauce:

  • 2 dried New Mexico red chiles
  • 3 dried guajillo chiles
  • 2 dried chipotle chiles
  • 1 T. butter
  • 1 small red onion, sliced
  • 4 garlic cloves, thinly sliced
  • 3 c. water
  • 2 T. honey
  • Salt and pepper, to taste


For the meat:

  • 3 lb. beef eye of round steak, trimmed and cut into ½” pieces
  • Salt and pepper
  • High smoke point oil for searing (grapeseed, avocado or vegetable)


For the soup:

  • 2 T. butter
  • 1 large onion, diced
  • 2–4 garlic cloves, thinly sliced
  • 1 T. high desert herbs
  • 2 t. ground coriander
  • 1, 14-oz. can fire-roasted diced tomatoes
  • 4 c. diced zucchini or butternut squash
  • 2 qt. (4 cups) beef broth

Instructions

First, let’s make the chile sauce.

Fill a medium saucepan with water and bring to a boil over high heat. Now place a large, heavy-bottomed soup pot over low heat.

Prepping the Chiles

Remove the stems and seeds from each of the dried chiles and break them into pieces. Transfer the chile pieces to the dry large pot and cook them over low heat for a couple of minutes to activate their flavor, stirring occasionally. Transfer the lightly seared chiles to the pot of hot water. It doesn’t matter if it is boiling yet, just throw them in and let them take a hot bath for ten minutes before straining and reserving the reconstituted chiles.

While they are in the water, add the butter to the soup pot along with the onion. Let the onions cook for around five minutes until they are starting to caramelize. Add the garlic, cook another minute or so more, and transfer this mixture to a blender. Add to the blender the reserved chiles, water, honey, and a pinch of salt and pepper. (Note: whenever measuring honey, with your finger, lightly rub the inside of the measuring spoon with oil before adding the honey to help it come out easier). Blend until completely smooth, taste, adjusting seasoning as needed and reserve.

Turn up the heat

Turn the heat up to medium-high and add 1 T. of the oil for searing to the pot. Generously season the diced beef with salt and pepper, and working in batches so as not to overcrowd the pan, sear the beef on all sides and transfer to a bowl. Repeat this process until all of the beef is seared. Reserve.

Now to the same pot add the butter. Add the onion and cook, stirring frequently until the onions are beginning to caramelize, around five minutes. Add the garlic and cook another minute more. Add the High Desert Herbs and coriander. Stir and let cook for a minute or so.

Simmer until tender

Now add the tomatoes to deglaze and scrape the bottom of the pan, making sure to incorporate all of the caramelized goodness into the chili. Add the chile sauce, seared meat, squash, and beef broth. Bring this to a boil and lower the heat to a simmer. Let this simmer for around two hours, or until the beef is tender. Taste and adjust seasoning as needed.


Did you make this recipe?

Tag @highdeserttable on Instagram so we can cheer you on! 🌟

Nutrition values are estimates only. See the disclaimer here.

Poblano Potato Puree

Marianne Sundquist · November 22, 2024 · Leave a Comment

I think I should begin with the acknowledgement that just as there are many ways to peel a potato, there are also many ways to make mashed potatoes. Sometimes I love to make mashed potatoes with a potato masher, the skins on and just a bit of olive oil, herbs and lemon zest. And there are other times (once a year in fact) when I make these potatoes at home and love every bit of this French style take on pomme puree.

Technically, the way I learned from my French chef instructors at school over 20 years ago was a ratio of 2:1:1. Meaning 2 part potatoes, 1 part milk (or cream) and 1 part butter. This recipe is already my most decadent take on potatoes and I’m not even going that far. But if you want to go for it, simply increase the butter and half & half to 2 cups each.

This recipe for poblano potato puree results in smooth, luscious potatoes, no lumps in sight. Let’s talk about ingredients! If you leave out the salt and pepper, there are only five ingredients, so each one matters.

Choosing the Right Potatoes for the Best Puree

When choosing potatoes, try to choose potatoes that are similar in size. This will help ensure that they cook evenly. If your potatoes vary in size, no worries! Just keep an eye on them throughout the cooking process, pulling potatoes as they reach the point of being fully cooked. And I have learned the hard way, make sure the potatoes are fully cooked, otherwise it will be difficult to pass them through the food mill.

The reason these potatoes are so luscious and smooth is because we spend a lot of effort removing as much water as possible. This is why we boil them whole as opposed to quartering them. This is also why we spend time stirring them in a hot pan after they’ve gone through the food mill to cook off any water remaining in the potatoes. Because of this, using a high quality butter (with a higher butterfat and lower water content) is a good idea.

Selecting the Perfect Green Chile for Your Dish

When it comes to green chiles, the choice is about what you love and how much heat you prefer. My love for poblanos is never ending. Their flavor and amount of heat easily takes the prize. But more importantly, what chiles do you have? What do you like and how hot do you want it? You could even use pints of frozen green chile just be sure to defrost, drain and press out as much water as possible before adding it to the cream and butter. How much to add? Trust your judgment and taste as you are warming up the cream mixture if needed to help you along.

The other thing that’s important to mention is the many different ways you can actually make these potatoes. If you don’t have a food mill, it’s ok! You can use a potato masher for the whole process. It might not be as smooth but it will taste just as good. Another option is to use a stand mixer with the whisk attachment. This is easiest to do with hot potatoes. Place the fully cooked and peeled potatoes in your stand mixer and slowly add the cream mixture until it all comes together.

Print

Poblano Potato Puree

HDT Poblano Potato Puree Plated
Print Recipe
Pin Recipe

5 Stars 4 Stars 3 Stars 2 Stars 1 Star

No reviews

Discover the perfect blend of creamy French-style pomme puree and spicy green chile in this Green Chile Potato Puree recipe. Learn how to achieve smooth, luscious mashed potatoes with a flavorful twist of poblanos and garlic.

  • Author: Marianne Sundquist
  • Prep Time: 30 mins
  • Cook Time: 1 hour
  • Total Time: 1.5 hours
  • Yield: 6 servings
  • Category: Thanksgiving
  • Method: simmer
  • Cuisine: New Mexican

Ingredients

Units
  • 3 lb. yukon gold potatoes, similar in size and washed well
  • 1 1/2 c. (3 sticks) unsalted butter
  • 1 1/2 c. cream, half & half or whole milk
  • 4 fire roasted poblanos, seeded, stemmed
  • 3 large garlic cloves, sliced
  • Salt and pepper, to taste

Instructions

How to Cook and Prepare the Potatoes

In a saucepan, cover the potatoes with cold water and season generously with salt. Bring to a simmer and cook until tender when pierced with a paring knife, about 40 minutes (the length of cooking time entirely depends on the size of your potatoes). Drain well. Let the potatoes cool just enough so they are safe to touch, then slip off and discard the skins and quarter them.

Making the Poblano Cream Mixture

While the potatoes are cooking, place the butter, half & half, poblanos and garlic in a saucepan. Once the butter is melted and the mixture is hot, turn off the heat and carefully blend until smooth. Reserve.

Processing the Potatoes through the Food Mill

Once the potatoes are peeled and quartered, working in batches, process them through the food mill arranged on top of a medium saucepan. Once the potatoes are all milled, place the pot over medium heat. With a heat proof rubber spatula, stir the potatoes for a few minutes, allowing any remaining water to cook off but being careful not to burn them. Turn the heat to low.

Bringing it All Together: Mixing and Tasting

Slowly pour in a bit of your poblano cream at a time, whisking into the potatoes until they fully absorb the liquid before pouring in some more. Continue this until all of the cream has been added.

Optional Steps for the Smoothest Potato Puree

This next step is optional, but at this point you could pass the potatoes through a fine mesh strainer or mesh sieve (this will result in the smoothest of smooth potatoes). Taste the potatoes and season them with salt and pepper as needed.

Storing and Reheating

Store in the fridge for up to 4 days and in the freezer for up to 1 month. To reheat, defrost the potatoes overnight in the fridge and then transfer them to a baking dish with a couple tablespoons of butter and a splash of cream. bake at 350 F. for 30 minutes before serving.

HDT Poblano Potato Puree Quart Containers

Did you make this recipe?

Tag @highdeserttable on Instagram so we can cheer you on! 🌟

Nutrition values are estimates only. See the disclaimer here.

Caramelized Onion & Red Chile Gravy

Marianne Sundquist · November 18, 2024 · Leave a Comment

Since the Thanksgiving season is upon us, I wanted to share my favorite way to approach a Southwest-themed red chile gravy. Very simply, it’s to make it the day before.

Why Make Gravy Ahead of Time?

When the turkey comes out of the oven the last thing I want to deal with is extra dishes, straining, scraping, and whisking on the fly. There are many cooks that don’t mind this and sometimes I daydream about being one of them. But the truth is, if it can be done ahead of time when there’s a lot going on in the kitchen, that’s exactly what you’ll find me doing. I’d rather be snacking from the cheese and veggie platter, tidying up the kitchen, or pouring guests drinks.

Don’t Waste Those Drippings

However you cook your turkey, I would recommend not letting any of the drippings go to waste. You can easily scrape them with a heatproof rubber spatula into a container and use them to make soup over the next couple of days.

For this recipe, you really have a few options: you can follow this recipe as is, you can make this recipe using only the turkey neck (usually found in the inside cavity of most birds) and then whisk in turkey jus from the roasting pan after the turkey comes out of the oven, or you can make this gravy vegetarian by leaving out the turkey and using vegetable broth which by the way, is delightful on top of mashed potatoes.

 Red Chile Gravy Ingredients carrots, onions, and herbs
Print

Caramelized Onion & Red Chile Gravy

Caramelized Onion & Red Chile Gravy Ceramic Bowl
Print Recipe
Pin Recipe

5 Stars 4 Stars 3 Stars 2 Stars 1 Star

No reviews

This make-ahead red chile gravy, made with homemade turkey stock, is the ultimate stress-free Thanksgiving side. Made with New Mexico red chile and caramelized onion, it’s perfect for topping mashed potatoes in your Southwest Thanksgiving dinner.

  • Author: Marianne Sundquist
  • Prep Time: 30 mins
  • Cook Time: 1.5 hours
  • Total Time: 2 hours
  • Yield: 6 cups
  • Category: Fall
  • Method: simmer
  • Cuisine: New Mexican

Ingredients

Units

for the turkey stock:

  • 2 turkey wings
  • 2 turkey legs
  • turkey neck if it’s inside your turkey
  • 1 red onion, quartered
  • 2 large carrots, quartered
  • 1 head of garlic, cut in half
  • Small handful of fresh herbs (any combo of sage, rosemary, parsley and/or thyme)
  • 1 T. olive oil
  • Crack of sea salt and pepper
  • 8 c. of chicken or turkey broth

for the gravy:

  • 8 T. butter
  • 1 large red or yellow onion, diced
  • 1/2 c. all-purpose flour or arrowroot powder
  • 1–2 t. red chile powder, depending on heat and preference
  • prepared turkey stock (around 6 c.)
  • Salt and pepper to taste

Instructions

Preheat the oven to 425 F. Dry turkey legs and the wing and neck (if you found one inside your bird) with a paper towel and place them in a deep dutch oven-style pan.

Caramelized Onion & Red Chile Gravy Ingredients in a dutch oven

Add the onion, carrots, garlic, herbs, olive oil, sea salt and pepper. Toss everything together and roast in the oven for 45 minutes, or until a thermometer inserted into the thickest part of the leg reads 165 F.


Carefully move dutch oven to the stovetop over medium heat. Add the broth and bring to a simmer. Using a wooden spoon, scrape any and all caramelized bits from the bottom of the pan. Let this simmer for 30 minutes. Using tongs, remove the turkey leg and wings for snacking and strain the broth through a fine mesh strainer.


To make the gravy, keep the dutch oven on the stove and turn the heat to medium. Melt the butter and add the onion. Let the onion cook in the butter until it’s caramelized, around 20 minutes.


How to Make a Perfect Roux


Whisk in the flour (or arrowroot) and chile powder. Take a minute or two to whisk this mixture (also called a roux) over the heat. While continuing to whisk, pour in the prepared turkey stock. I stay close to the stove at this point and continue to whisk frequently as the gravy comes to a simmer and thickens.

Caramelized Onion & Red Chile Gravy Whisking the Roux

Let the gravy simmer for around five minutes. Taste and add salt and pepper to taste. Let cool to room temperature before transferring to a container in the fridge. When ready to serve, warm gravy in a saucepan over medium heat.

Did you make this recipe?

Tag @highdeserttable on Instagram so we can cheer you on! 🌟

Nutrition values are estimates only. See the disclaimer here.

Fire-Roasted Green Chile Risotto

Marianne Sundquist · June 29, 2024 · Leave a Comment

There are few things I love to cook more than risotto. Honestly, I can’t think of anything else except fresh pasta or a summer pie. And I guess what I mean is, that no part of making this Italian rice feels like a chore. Rather more of a gift. When else in the course of a day do you have the chance to stand still and watch simmering rice bloom in warm, buttery broth? Usually, once during the cooking process, I can’t help but think that a pot of risotto cooking on the stove resembles a hungry baby. It’s a hilarious and delightful thought. And I continue on, feeding it one ladle of broth at a time until at last the rice is tender and ready to be finished with parmesan and fresh whipped cream.

You’ll notice this recipe calls for fire-roasted green chiles. There’s a lot of room for interpretation and personal preference here. I rummaged around in my freezer and used a mix of fire-roasted Sandia and poblano chiles. First and foremost, you can use the chiles that you have. If you don’t have a stash in the freezer, don’t despair! You can use frozen green chiles available in most grocery stores in the state (just defrost and drain) or you can buy Anaheim or Poblano chiles and blacken them over a grill or in the oven and then peel the skin off. 

Green Chile Risotto Ingredients

This is a recipe where each detail matters. I like to gather all of my ingredients ahead of time so the cooking flow feels pleasant and easy. Oh, the joy of mise en place never disappoints. In the recipe, you’ll notice that we toast the rice for around four minutes in the pot before adding liquid. This step creates a barrier around each grain of rice, allowing it to absorb liquid slowly and retain its texture without becoming sticky.

This risotto can be served on its own (preferably on a warm flat plate), or paired with roasted wild mushrooms, roasted vegetables, and a variety of fish or meat. It can be served as a side but is perfectly delightful as the entire dinner.

Print

Fire-roasted green chile risotto

Green Chile Risotto in a bowl
Print Recipe
Pin Recipe

5 Stars 4 Stars 3 Stars 2 Stars 1 Star

No reviews

Discover the joy of making the perfect risotto with fire-roasted green chiles. This risotto can be served on its own, or paired with roasted wild mushrooms, roasted vegetables, and a variety of fish or meat. It can be served as a side dish but is perfectly delightful for the entire dinner.

  • Author: Marianne Sundquist
  • Prep Time: 45 mins
  • Cook Time: 45 mins
  • Total Time: 1.5 hours
  • Yield: 6 servings
  • Category: dinner
  • Cuisine: italian

Ingredients

Units
  • 8 T. butter, divided
  • 6 c. vegetable or chicken broth
  • 6 large shallots, sliced
  • 4 cloves garlic, finely chopped
  • 2 T. fresh rosemary leaves, finely chopped
  • 1/2 c. fire-roasted green chiles, peeled, seeded and chopped
  • 2 c. arborio or carnaroli rice
  • 1 c. dry white wine
  • 1 1/2 c. freshly grated parmesan cheese
  • 1 c. heavy cream, whipped to stiff peaks
  • Salt and pepper, to taste

Instructions

Making the broth

In a large saucepan over medium heat, add 4 Tablespoons of butter. Keep a close eye on it as it melts, then foams then starts to turn a golden brown. Once the butter has turned a deep golden brown (but not burned), very carefully whisk in the broth. Be careful because it will steam. Season lightly with salt and pepper. Bring this mixture to a simmer, then turn the heat to low while you prepare the risotto.

Caramelize

In a large and wide, heavy-bottomed pot over medium heat add the remaining 4 Tablespoons of butter. Once it melts, add the shallots. We are going to let the shallots caramelize, so this will take some time. Let them cook over low heat, stirring frequently with a wooden spoon until they are golden brown. This will take 30-45 minutes. If it seems they are cooking unevenly or you see some dark spots, add a splash of the warm broth to scrape the bottom of the pan and continue cooking the onions until they have fully caramelized.

green-chile-risotto prepping the shallots

Time to toast

Now add the garlic, rosemary, and green chiles. Cook for another couple of minutes. Now add the rice and cook for around five minutes stirring frequently. This is us toasting the rice!

Now carefully add the white wine, scraping any caramelly bits from the bottom of the pot, and let cook until most of the liquid has evaporated.

green-chile-risotto prepping the rice

Adding the broth

At this point, we are going to slowly feed a ladle full of the warm broth to the rice and stir frequently. Over time, the rice will absorb the broth and you can add another ladle and another, continuing to stir and adding broth until the rice has almost fully absorbed all the broth and is “al dente” to the taste, meaning that it is cooked but still retains a bite and definitely not mushy. If you use all the broth and still feel like the rice needs more liquid, feel free to use a little water to finish cooking.

Finishing touch

Add the parmesan cheese, and stir for a minute. Now, right before serving, add the freshly whipped cream. Fold the cream into the risotto with a large heat-proof spatula, letting as much air transfer to the risotto. Give it a taste and add salt and/or pepper as needed.

To serve, spoon the risotto in bowls or large flat plates. If you serve on a plate, spoon the risotto in the center and let it spread towards the edges.

Green Chile Risotto in a bowl

Did you make this recipe?

Tag @highdeserttable on Instagram so we can cheer you on! 🌟

Nutrition values are estimates only. See the disclaimer here.

  • Page 1
  • Page 2
  • Page 3
  • Go to Next Page »

High Desert Table

Copyright © 2025 · High Desert Table

  • Privacy Policy
  • Nutrition Disclaimer